转录电报机器人
Build a Telegram bot that transcribes audio and video messages in 99 languages using TypeScript with Deno in Supabase Edge Functions.
介绍 #
🌐 Introduction
在本教程中,你将学习如何使用 TypeScript 和 ElevenLabs Scribe 模型,通过 语音转文字 API 构建一个能够用 99 种语言转录音频和视频消息的 Telegram 机器人。
🌐 In this tutorial you will learn how to build a Telegram bot that transcribes audio and video messages in 99 languages using TypeScript and the ElevenLabs Scribe model via the speech to text API.
要看看最终效果会是什么样子,你可以试试 t.me/ElevenLabsScribeBot
🌐 To check out what the end result will look like, you can test out the t.me/ElevenLabsScribeBot
在 GitHub 上找到这个 示例项目。
🌐 Find the example project on GitHub.
要求 #
🌐 Requirements
- 一个带有API 密钥的 ElevenLabs 账户。
- 一个 Supabase 账户(你可以通过 database.new 注册一个免费账户)。
- 你电脑上安装了 Supabase CLI。
- 你电脑上已安装了 Deno 运行时,并且可以选择在你喜欢的 IDE 中 进行设置。
- 一个 Telegram 账号。
设置 #
🌐 Setup
注册一个 Telegram 机器人 #
🌐 Register a Telegram bot
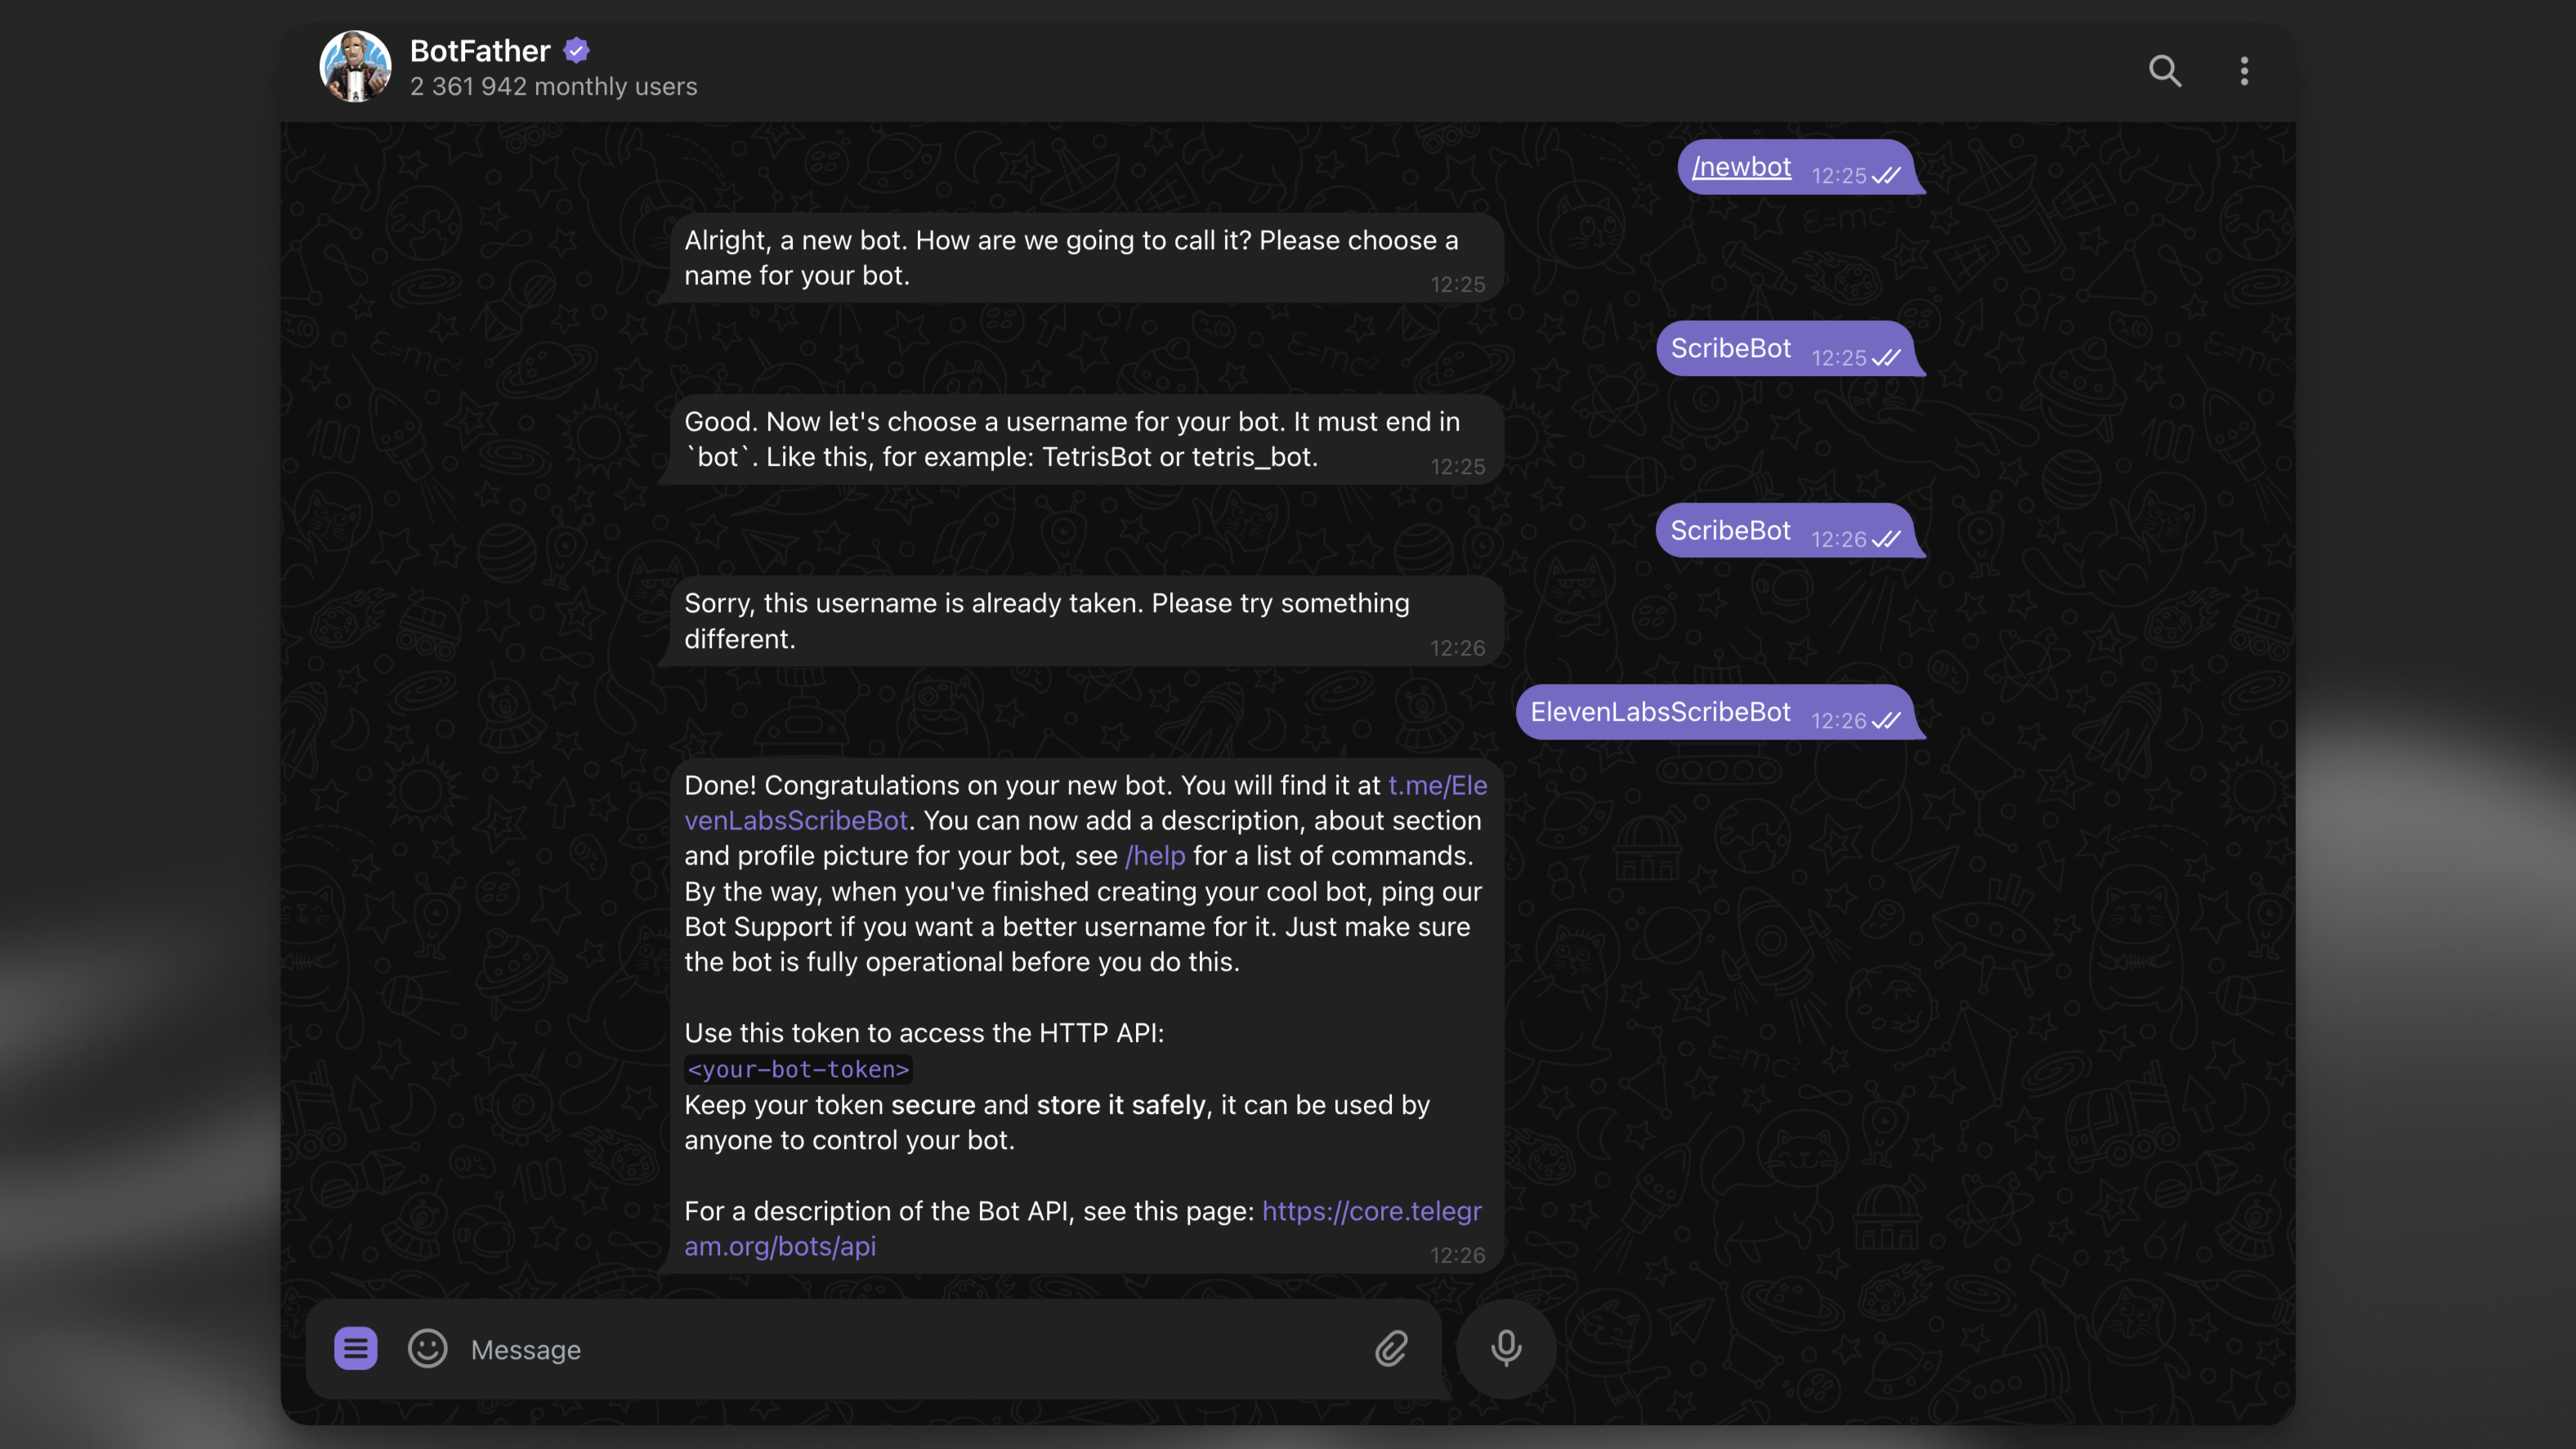
使用 BotFather 创建一个新的 Telegram 机器人。运行 /newbot 命令并按照说明创建新的机器人。最后,你会收到你的秘密机器人令牌。请安全地记下它,以便下一步使用。
🌐 Use the BotFather to create a new Telegram bot. Run the /newbot command and follow the instructions to create a new bot. At the end, you will receive your secret bot token. Note it down securely for the next step.
在本地创建一个 Supabase 项目 #
🌐 Create a Supabase project locally
安装 Supabase CLI 后,运行以下命令在本地创建一个新的 Supabase 项目:
🌐 After installing the Supabase CLI, run the following command to create a new Supabase project locally:
1supabase init创建一个数据库表来记录转录结果 #
🌐 Create a database table to log the transcription results
接下来,创建一个新的数据库表来记录转录结果:
🌐 Next, create a new database table to log the transcription results:
1supabase migrations new init这将在 supabase/migrations 目录下创建一个新的迁移文件。打开文件并添加以下 SQL:
🌐 This will create a new migration file in the supabase/migrations directory. Open the file and add the following SQL:
1CREATE TABLE IF NOT EXISTS transcription_logs (2 id BIGSERIAL PRIMARY KEY,3 file_type VARCHAR NOT NULL,4 duration INTEGER NOT NULL,5 chat_id BIGINT NOT NULL,6 message_id BIGINT NOT NULL,7 username VARCHAR,8 transcript TEXT,9 language_code VARCHAR,10 created_at TIMESTAMP WITH TIME ZONE DEFAULT CURRENT_TIMESTAMP,11 error TEXT12);1314ALTER TABLE transcription_logs ENABLE ROW LEVEL SECURITY;创建一个 Supabase Edge 函数来处理 Telegram 的 webhook 请求 #
🌐 Create a Supabase Edge Function to handle Telegram webhook requests
接下来,创建一个新的 Edge 函数来处理 Telegram 的 webhook 请求:
🌐 Next, create a new Edge Function to handle Telegram webhook requests:
1supabase functions new scribe-bot如果你在使用 VS Code 或 Cursor,当命令行提示“为 Deno 生成 VS Code 设置?[y/N]”时,选择 y 就行!
🌐 If you're using VS Code or Cursor, select y when the CLI prompts "Generate VS Code settings for Deno? [y/N]"!
设置环境变量 #
🌐 Set up the environment variables
在 supabase/functions 目录下,创建一个新的 .env 文件,并添加以下变量:
🌐 Within the supabase/functions directory, create a new .env file and add the following variables:
1# Find / create an API key at https://elevenlabs.io/app/settings/api-keys2ELEVENLABS_API_KEY=your_api_key34# The bot token you received from the BotFather.5TELEGRAM_BOT_TOKEN=your_bot_token67# A random secret chosen by you to secure the function.8FUNCTION_SECRET=random_secret依赖 #
🌐 Dependencies
这个项目用了几个依赖:
🌐 The project uses a couple of dependencies:
- 开源的 grammY Framework 用来处理 Telegram 的 webhook 请求。
- @supabase/supabase-js 库用于与 Supabase 数据库互动。
- ElevenLabs 的 JavaScript SDK 用来与语音转文本 API 互动。
由于 Supabase Edge Function 使用的是 Deno 运行时,你不需要安装依赖,而是可以通过 npm: 前缀来导入它们。
🌐 Since Supabase Edge Function uses the Deno runtime, you don't need to install the dependencies, rather you can import them via the npm: prefix.
编写 Telegram 机器人代码 #
🌐 Code the Telegram bot
在你新创建的 scribe-bot/index.ts 文件中,添加以下代码:
🌐 In your newly created scribe-bot/index.ts file, add the following code:
1import { Bot, webhookCallback } from 'npm:grammy@^1'23import 'jsr:@supabase/functions-js/edge-runtime.d.ts'45import { withSupabase } from 'npm:@supabase/server@^1'6import type { SupabaseClient } from 'npm:@supabase/supabase-js@^2'7import { ElevenLabsClient } from 'npm:elevenlabs@^1'89console.log(`Function "elevenlabs-scribe-bot" up and running!`)1011const elevenLabsClient = new ElevenLabsClient({12 apiKey: Deno.env.get('ELEVENLABS_API_KEY') || '',13})1415async function scribe({16 supabaseAdmin,17 fileURL,18 fileType,19 duration,20 chatId,21 messageId,22 username,23}: {24 supabaseAdmin: SupabaseClient25 fileURL: string26 fileType: string27 duration: number28 chatId: number29 messageId: number30 username: string31}) {32 let transcript: string | null = null33 let languageCode: string | null = null34 let errorMsg: string | null = null35 try {36 const sourceFileArrayBuffer = await fetch(fileURL).then((res) => res.arrayBuffer())37 const sourceBlob = new Blob([sourceFileArrayBuffer], {38 type: fileType,39 })4041 const scribeResult = await elevenLabsClient.speechToText.convert({42 file: sourceBlob,43 model_id: 'scribe_v1',44 tag_audio_events: false,45 })4647 transcript = scribeResult.text48 languageCode = scribeResult.language_code4950 // Reply to the user with the transcript51 await bot.api.sendMessage(chatId, transcript, {52 reply_parameters: { message_id: messageId },53 })54 } catch (error) {55 errorMsg = error.message56 console.log(errorMsg)57 await bot.api.sendMessage(chatId, 'Sorry, there was an error. Please try again.', {58 reply_parameters: { message_id: messageId },59 })60 }61 // Write log to Supabase.62 const logLine = {63 file_type: fileType,64 duration,65 chat_id: chatId,66 message_id: messageId,67 username,68 language_code: languageCode,69 error: errorMsg,70 }71 console.log({ logLine })72 await supabaseAdmin.from('transcription_logs').insert({ ...logLine, transcript })73}7475// Set by the request handler before delegating to grammY, so bot handlers76// can write transcription logs with the admin client.77let supabaseAdmin: SupabaseClient7879const telegramBotToken = Deno.env.get('TELEGRAM_BOT_TOKEN')80const bot = new Bot(telegramBotToken || '')81const startMessage = `Welcome to the ElevenLabs Scribe Bot\\! I can transcribe speech in 99 languages with super high accuracy\\!82 \nTry it out by sending or forwarding me a voice message, video, or audio file\\!83 \n[Learn more about Scribe](https://elevenlabs.io/speech-to-text) or [build your own bot](https://elevenlabs.io/docs/cookbooks/speech-to-text/telegram-bot)\\!84 `85bot.command('start', (ctx) => ctx.reply(startMessage.trim(), { parse_mode: 'MarkdownV2' }))8687bot.on([':voice', ':audio', ':video'], async (ctx) => {88 try {89 const file = await ctx.getFile()90 const fileURL = `https://api.telegram.org/file/bot${telegramBotToken}/${file.file_path}`91 const fileMeta = ctx.message?.video ?? ctx.message?.voice ?? ctx.message?.audio9293 if (!fileMeta) {94 return ctx.reply('No video|audio|voice metadata found. Please try again.')95 }9697 // Run the transcription in the background.98 EdgeRuntime.waitUntil(99 scribe({100 supabaseAdmin,101 fileURL,102 fileType: fileMeta.mime_type!,103 duration: fileMeta.duration,104 chatId: ctx.chat.id,105 messageId: ctx.message?.message_id!,106 username: ctx.from?.username || '',107 })108 )109110 // Reply to the user immediately to let them know we received their file.111 return ctx.reply('Received. Scribing...')112 } catch (error) {113 console.error(error)114 return ctx.reply(115 'Sorry, there was an error getting the file. Please try again with a smaller file!'116 )117 }118})119120const handleUpdate = webhookCallback(bot, 'std/http')121122// Deploy with verify_jwt = false123// The bot is called by Telegram, so we verify the request with FUNCTION_SECRET in code.124export default {125 fetch: withSupabase({ auth: 'none' }, async (req, ctx) => {126 try {127 const url = new URL(req.url)128 if (url.searchParams.get('secret') !== Deno.env.get('FUNCTION_SECRET')) {129 return Response.json({ error: 'not allowed' }, { status: 405 })130 }131132 supabaseAdmin = ctx.supabaseAdmin133134 return await handleUpdate(req)135 } catch (err) {136 console.error(err)137 }138 }),139}部署到 Supabase #
🌐 Deploy to Supabase
如果你还没有的话,可以在 database.new 创建一个新的 Supabase 账户,并将本地项目连接到你的 Supabase 账户:
🌐 If you haven't already, create a new Supabase account at database.new and link the local project to your Supabase account:
1supabase link应用数据库迁移 #
🌐 Apply the database migrations
运行以下命令以应用来自 supabase/migrations 目录的数据库迁移:
🌐 Run the following command to apply the database migrations from the supabase/migrations directory:
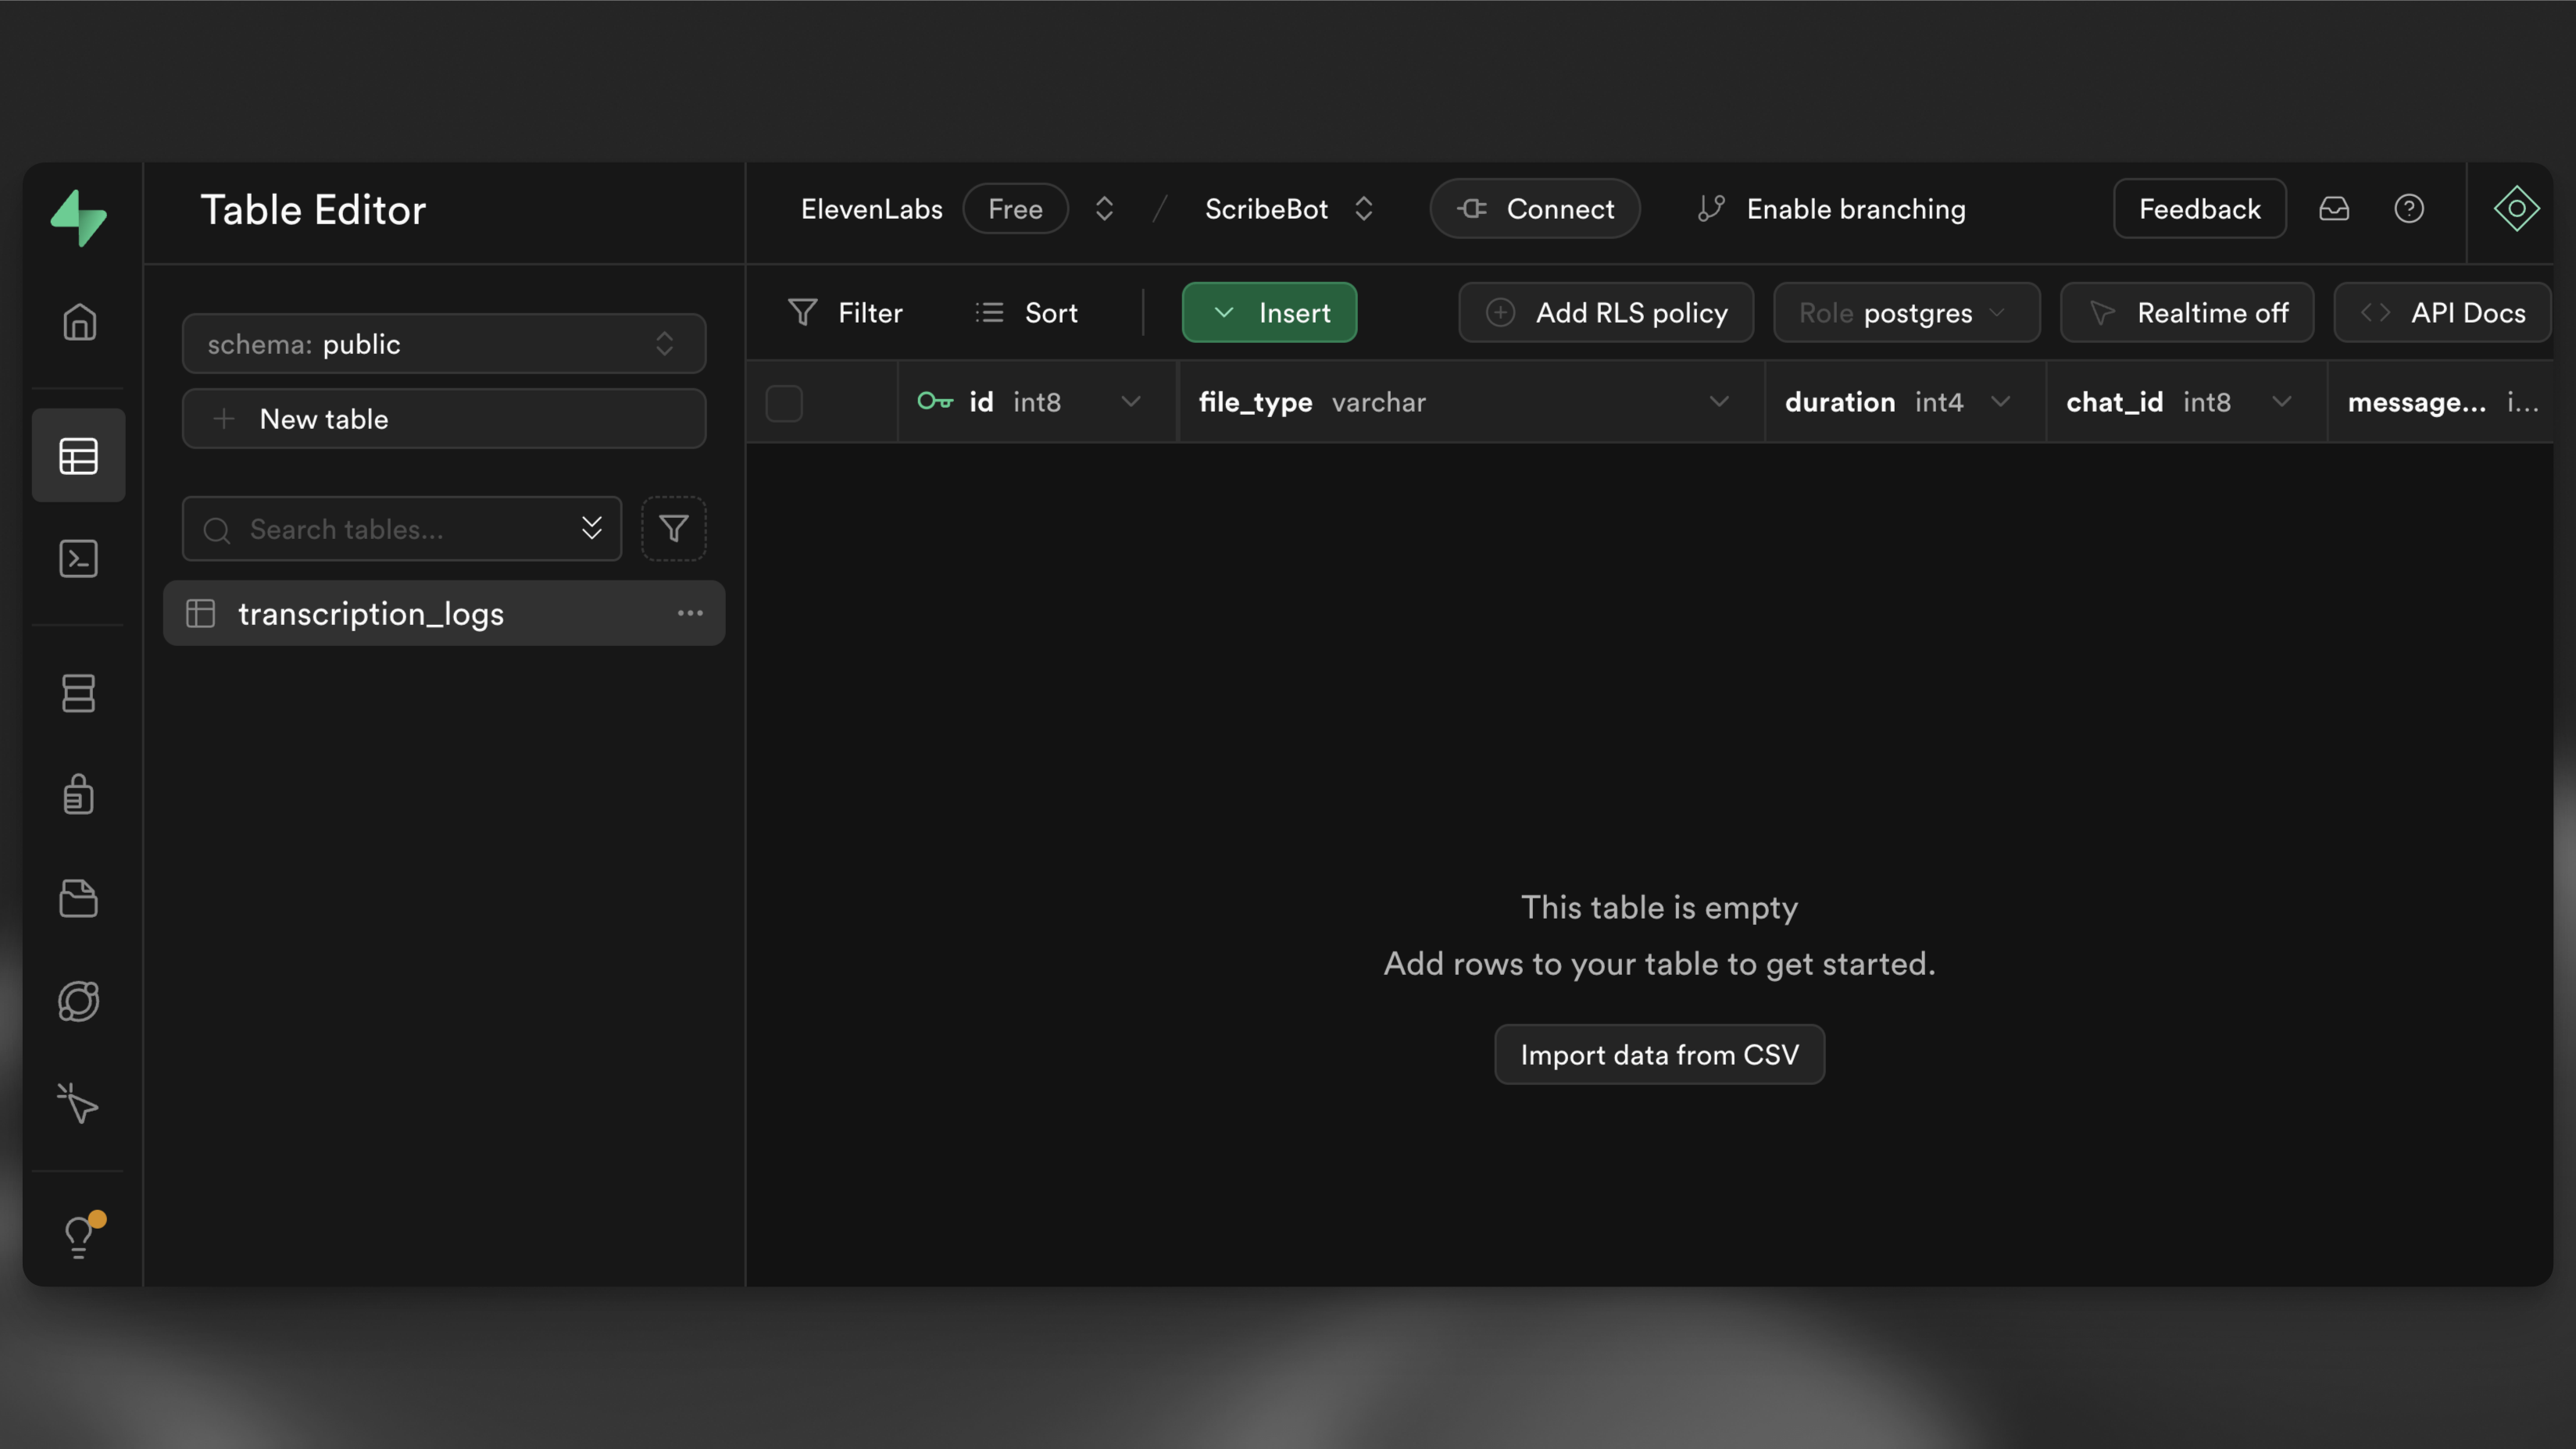
1supabase db push在你的 Supabase 仪表板中导航到 表格编辑器,你应该会看到一个空的 transcription_logs 表。
🌐 Navigate to the table editor in your Supabase dashboard and you should see and empty transcription_logs table.
最后,运行以下命令来部署 Edge 功能:
🌐 Lastly, run the following command to deploy the Edge Function:
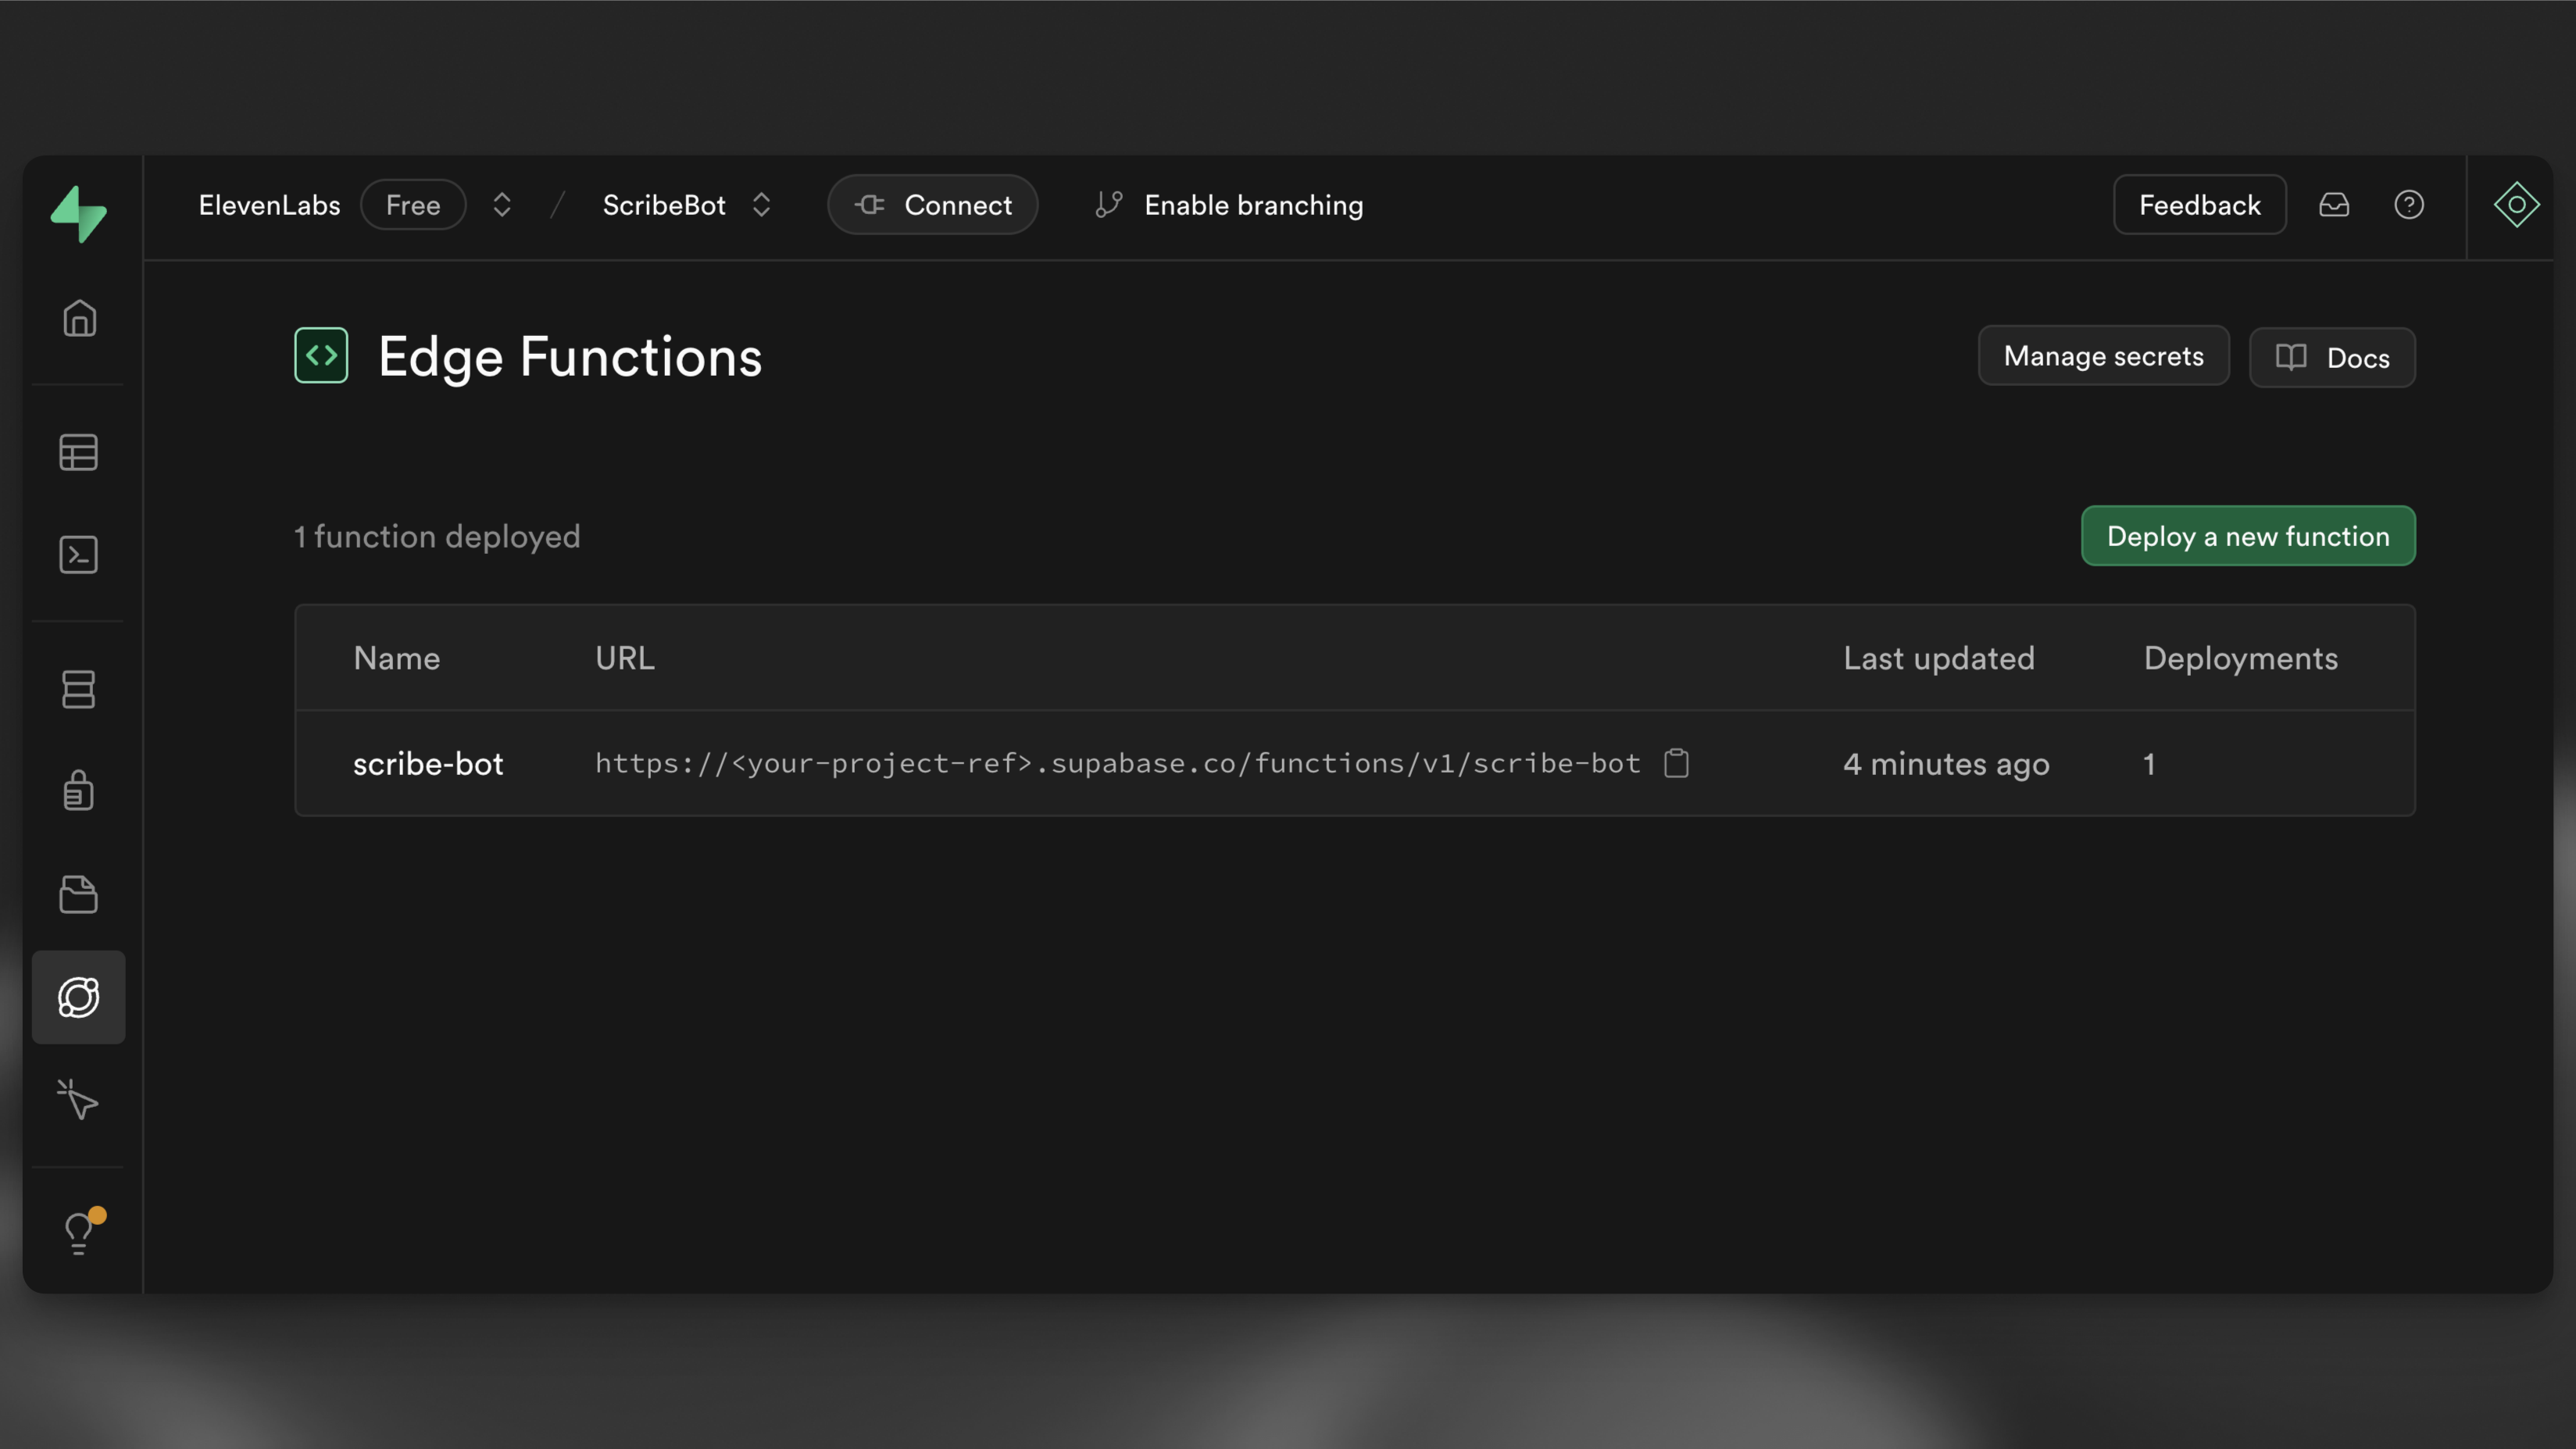
1supabase functions deploy --no-verify-jwt scribe-bot在你的 Supabase 仪表板中导航到 Edge Functions 视图,你应该能看到已部署的 scribe-bot 函数。记下函数的 URL,因为你稍后会用到,它应该看起来像 https://<project-ref>.functions.supabase.co/scribe-bot。
设置 webhook #
🌐 Set up the webhook
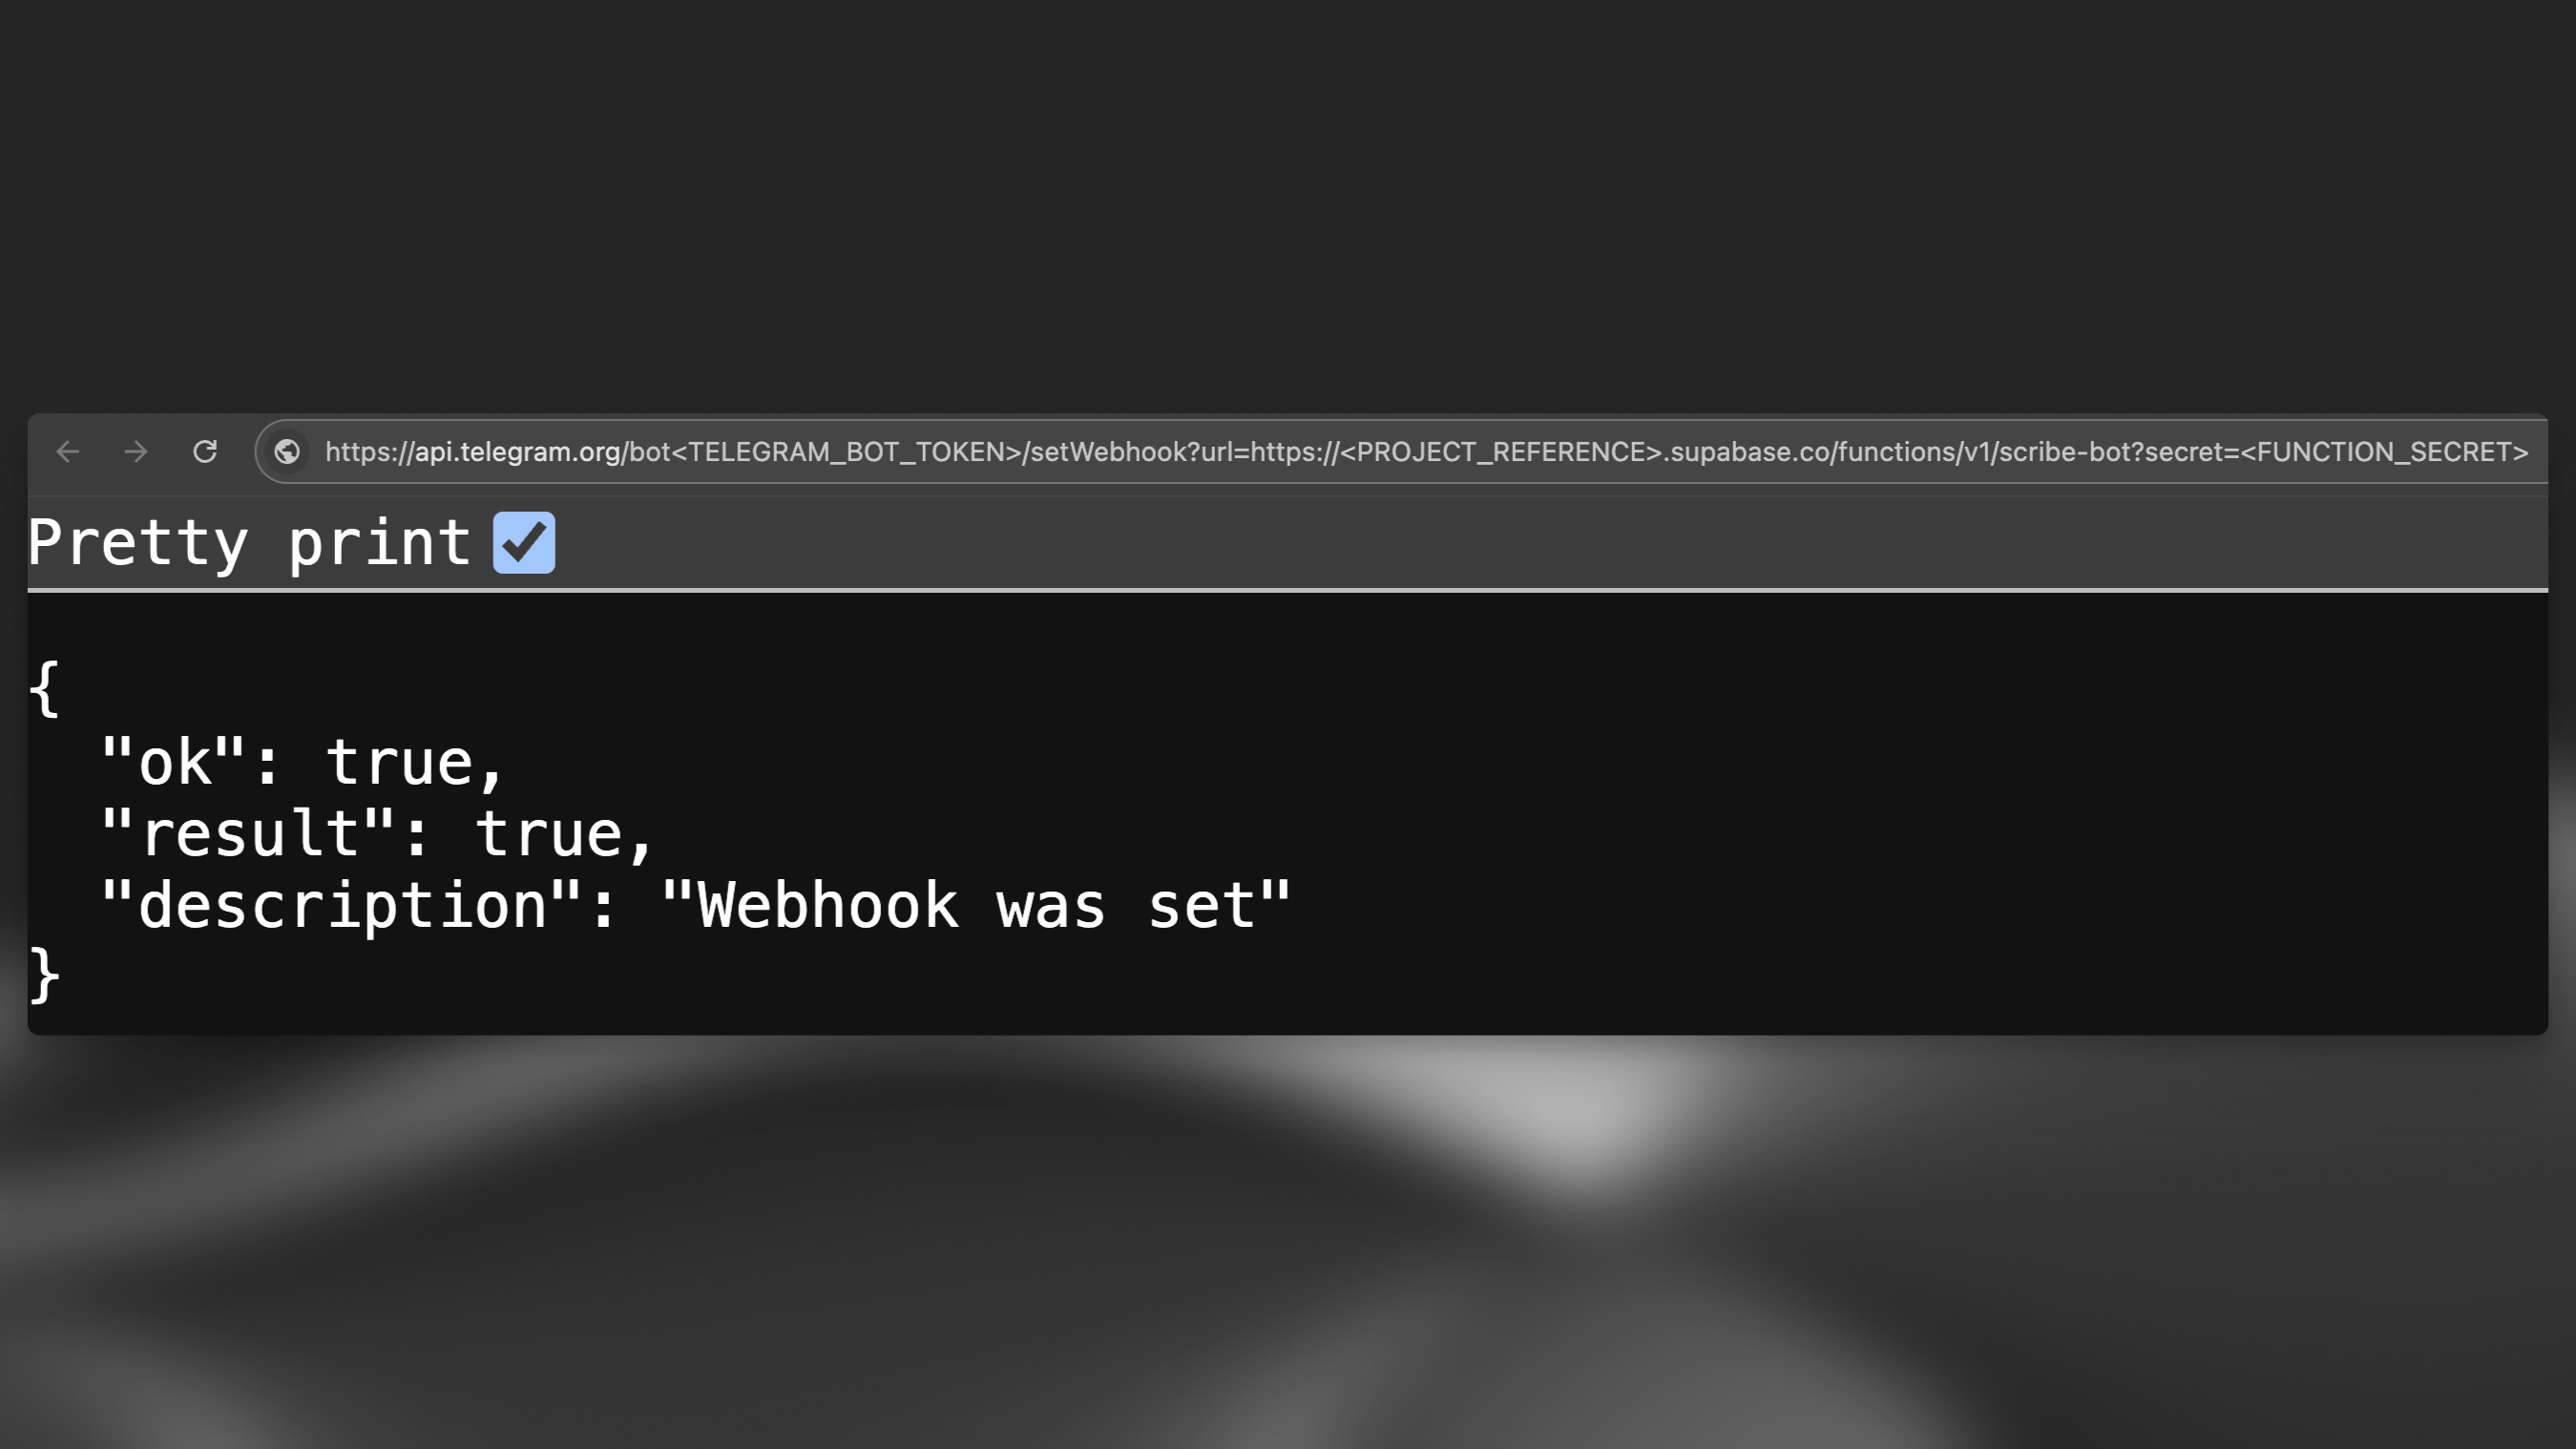
将你的机器人 webhook URL 设置为 https://<PROJECT_REFERENCE>.functions.supabase.co/telegram-bot(将 <...> 替换为相应的值)。为此,可以向以下 URL 发送一个 GET 请求(例如在你的浏览器中):
1https://api.telegram.org/bot<TELEGRAM_BOT_TOKEN>/setWebhook?url=https://<PROJECT_REFERENCE>.supabase.co/functions/v1/scribe-bot?secret=<FUNCTION_SECRET>注意,FUNCTION_SECRET 是你在 .env 文件中设置的密钥。
🌐 Note that the FUNCTION_SECRET is the secret you set in your .env file.
设置函数秘密 #
🌐 Set the function secrets
既然你已经在本地设置好了所有的密钥,你可以运行以下命令将这些密钥设置到你的 Supabase 项目中:
🌐 Now that you have all your secrets set locally, you can run the following command to set the secrets in your Supabase project:
1supabase secrets set --env-file supabase/functions/.env测试一下机器人 #
🌐 Test the bot
最后你可以通过发送语音消息、音频或视频文件来测试这个机器人。
🌐 Finally you can test the bot by sending it a voice message, audio or video file.
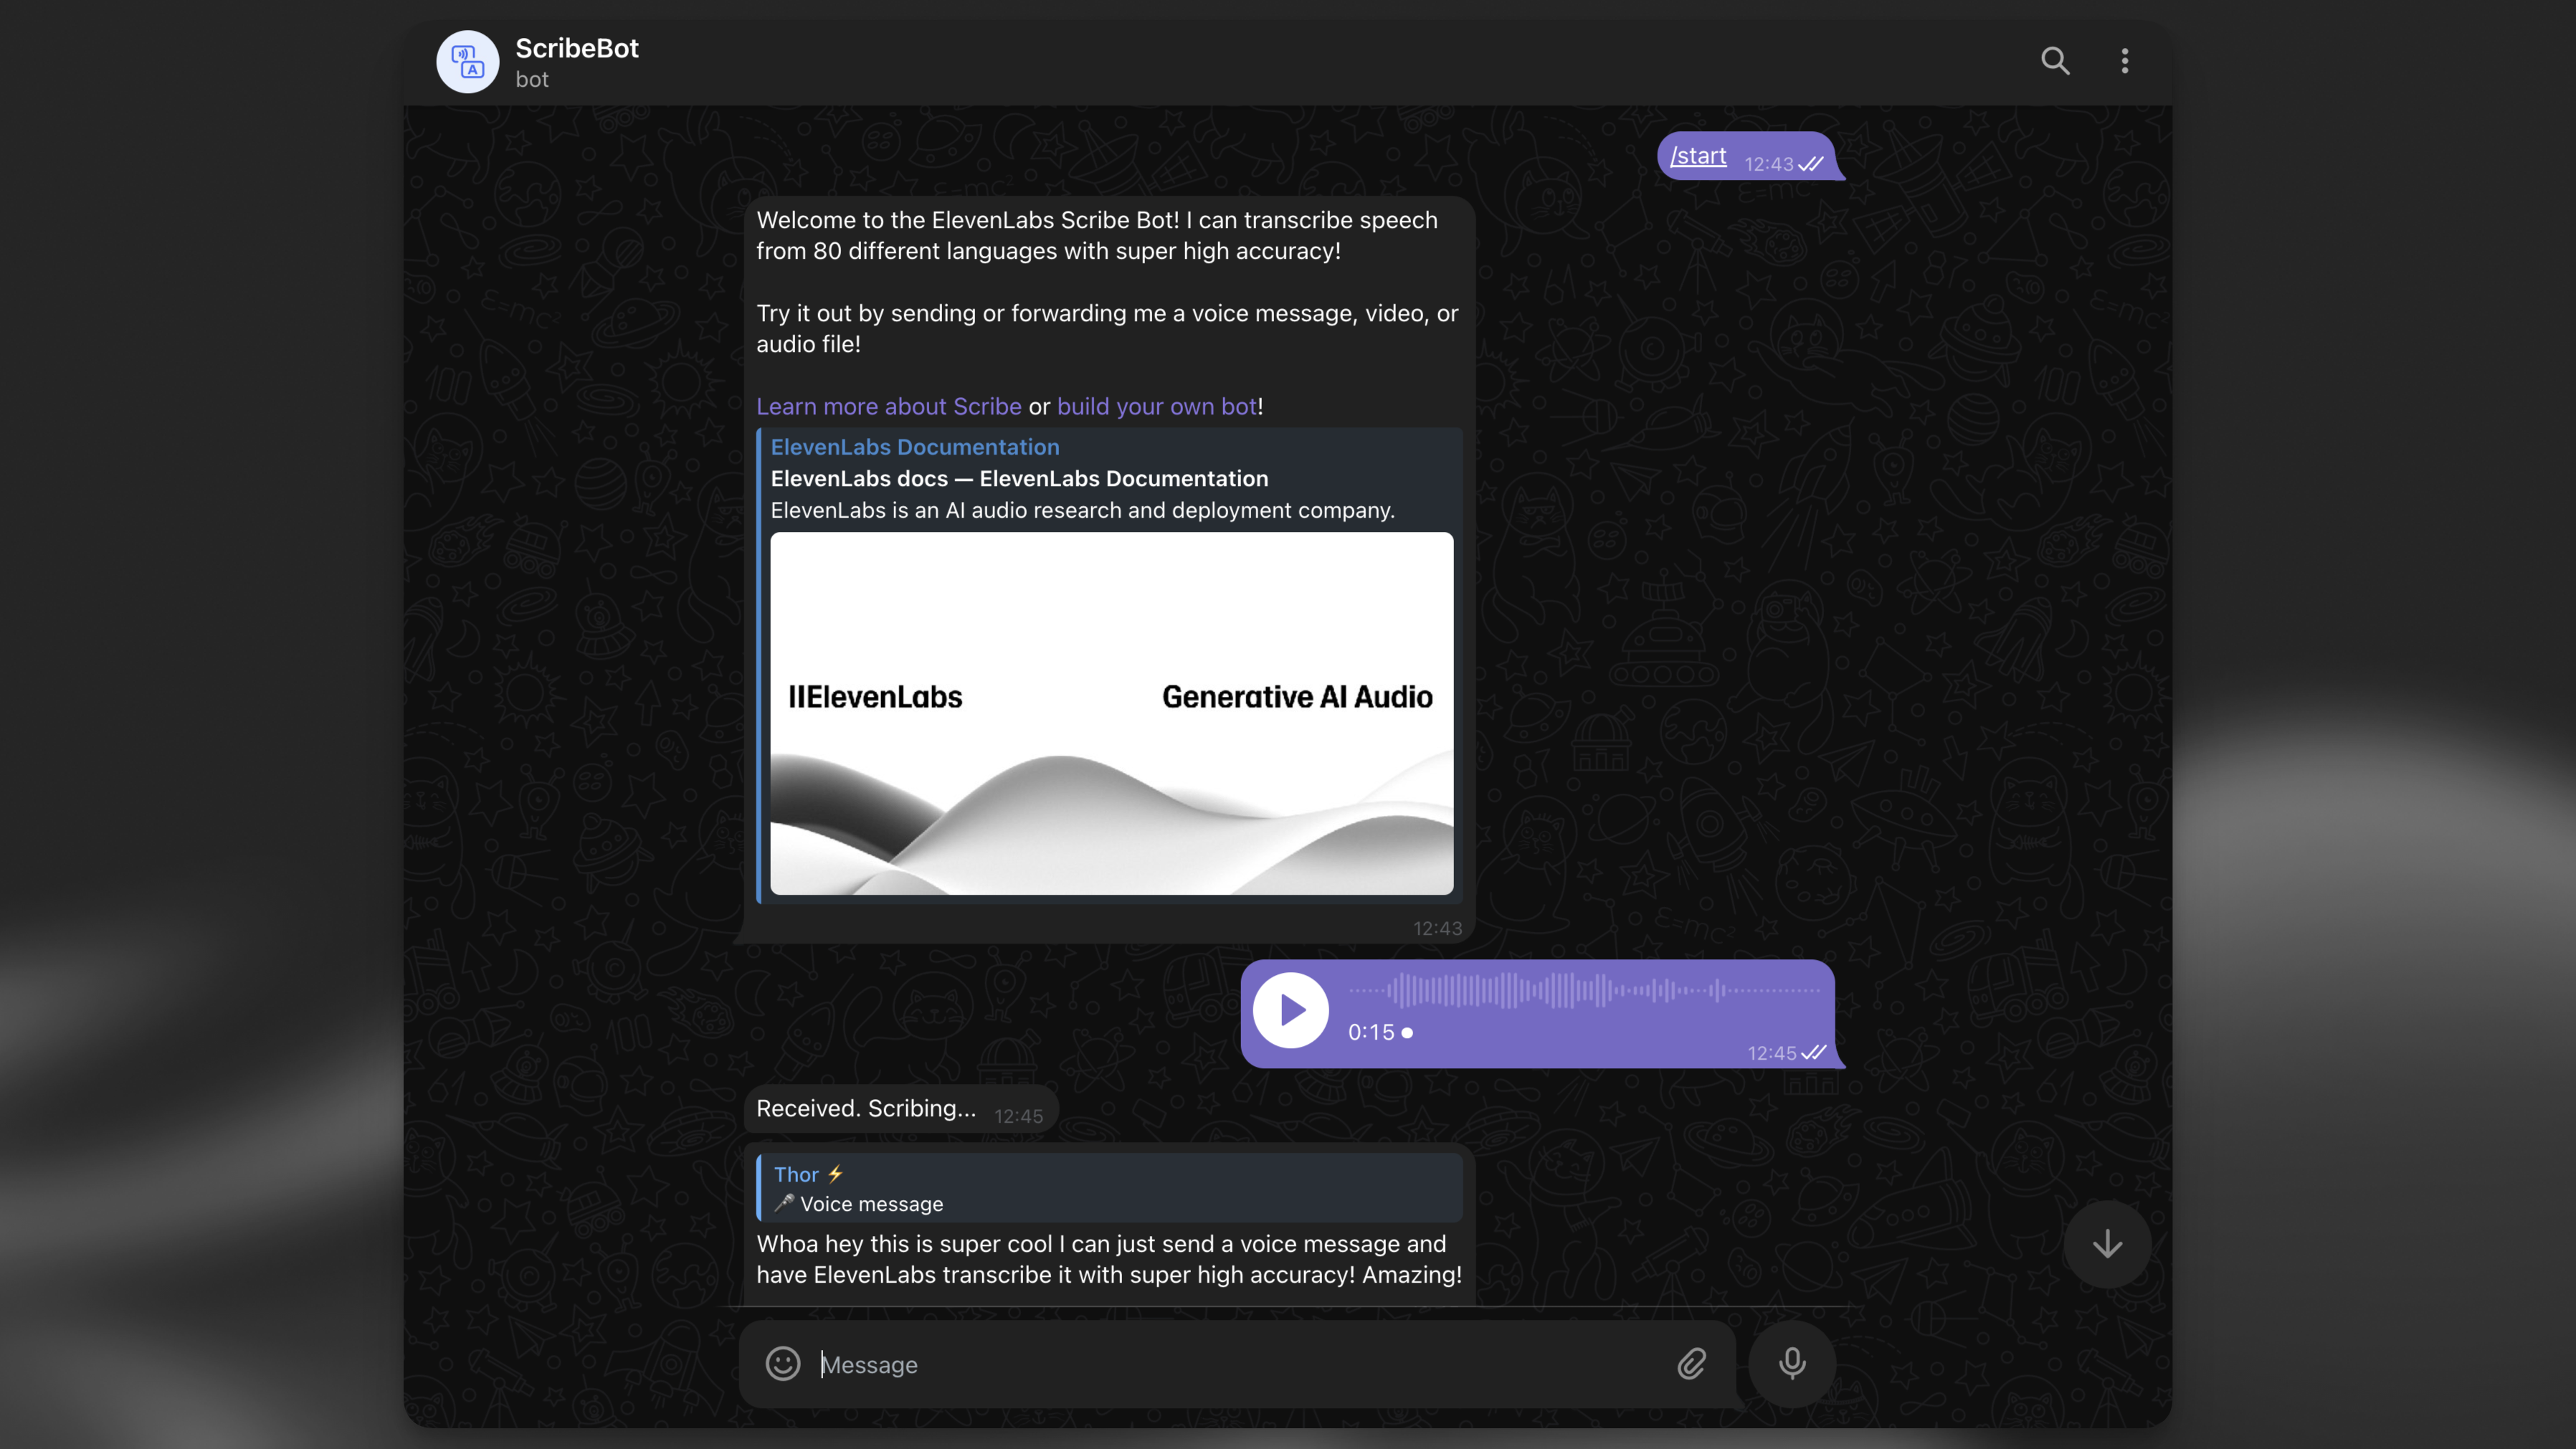
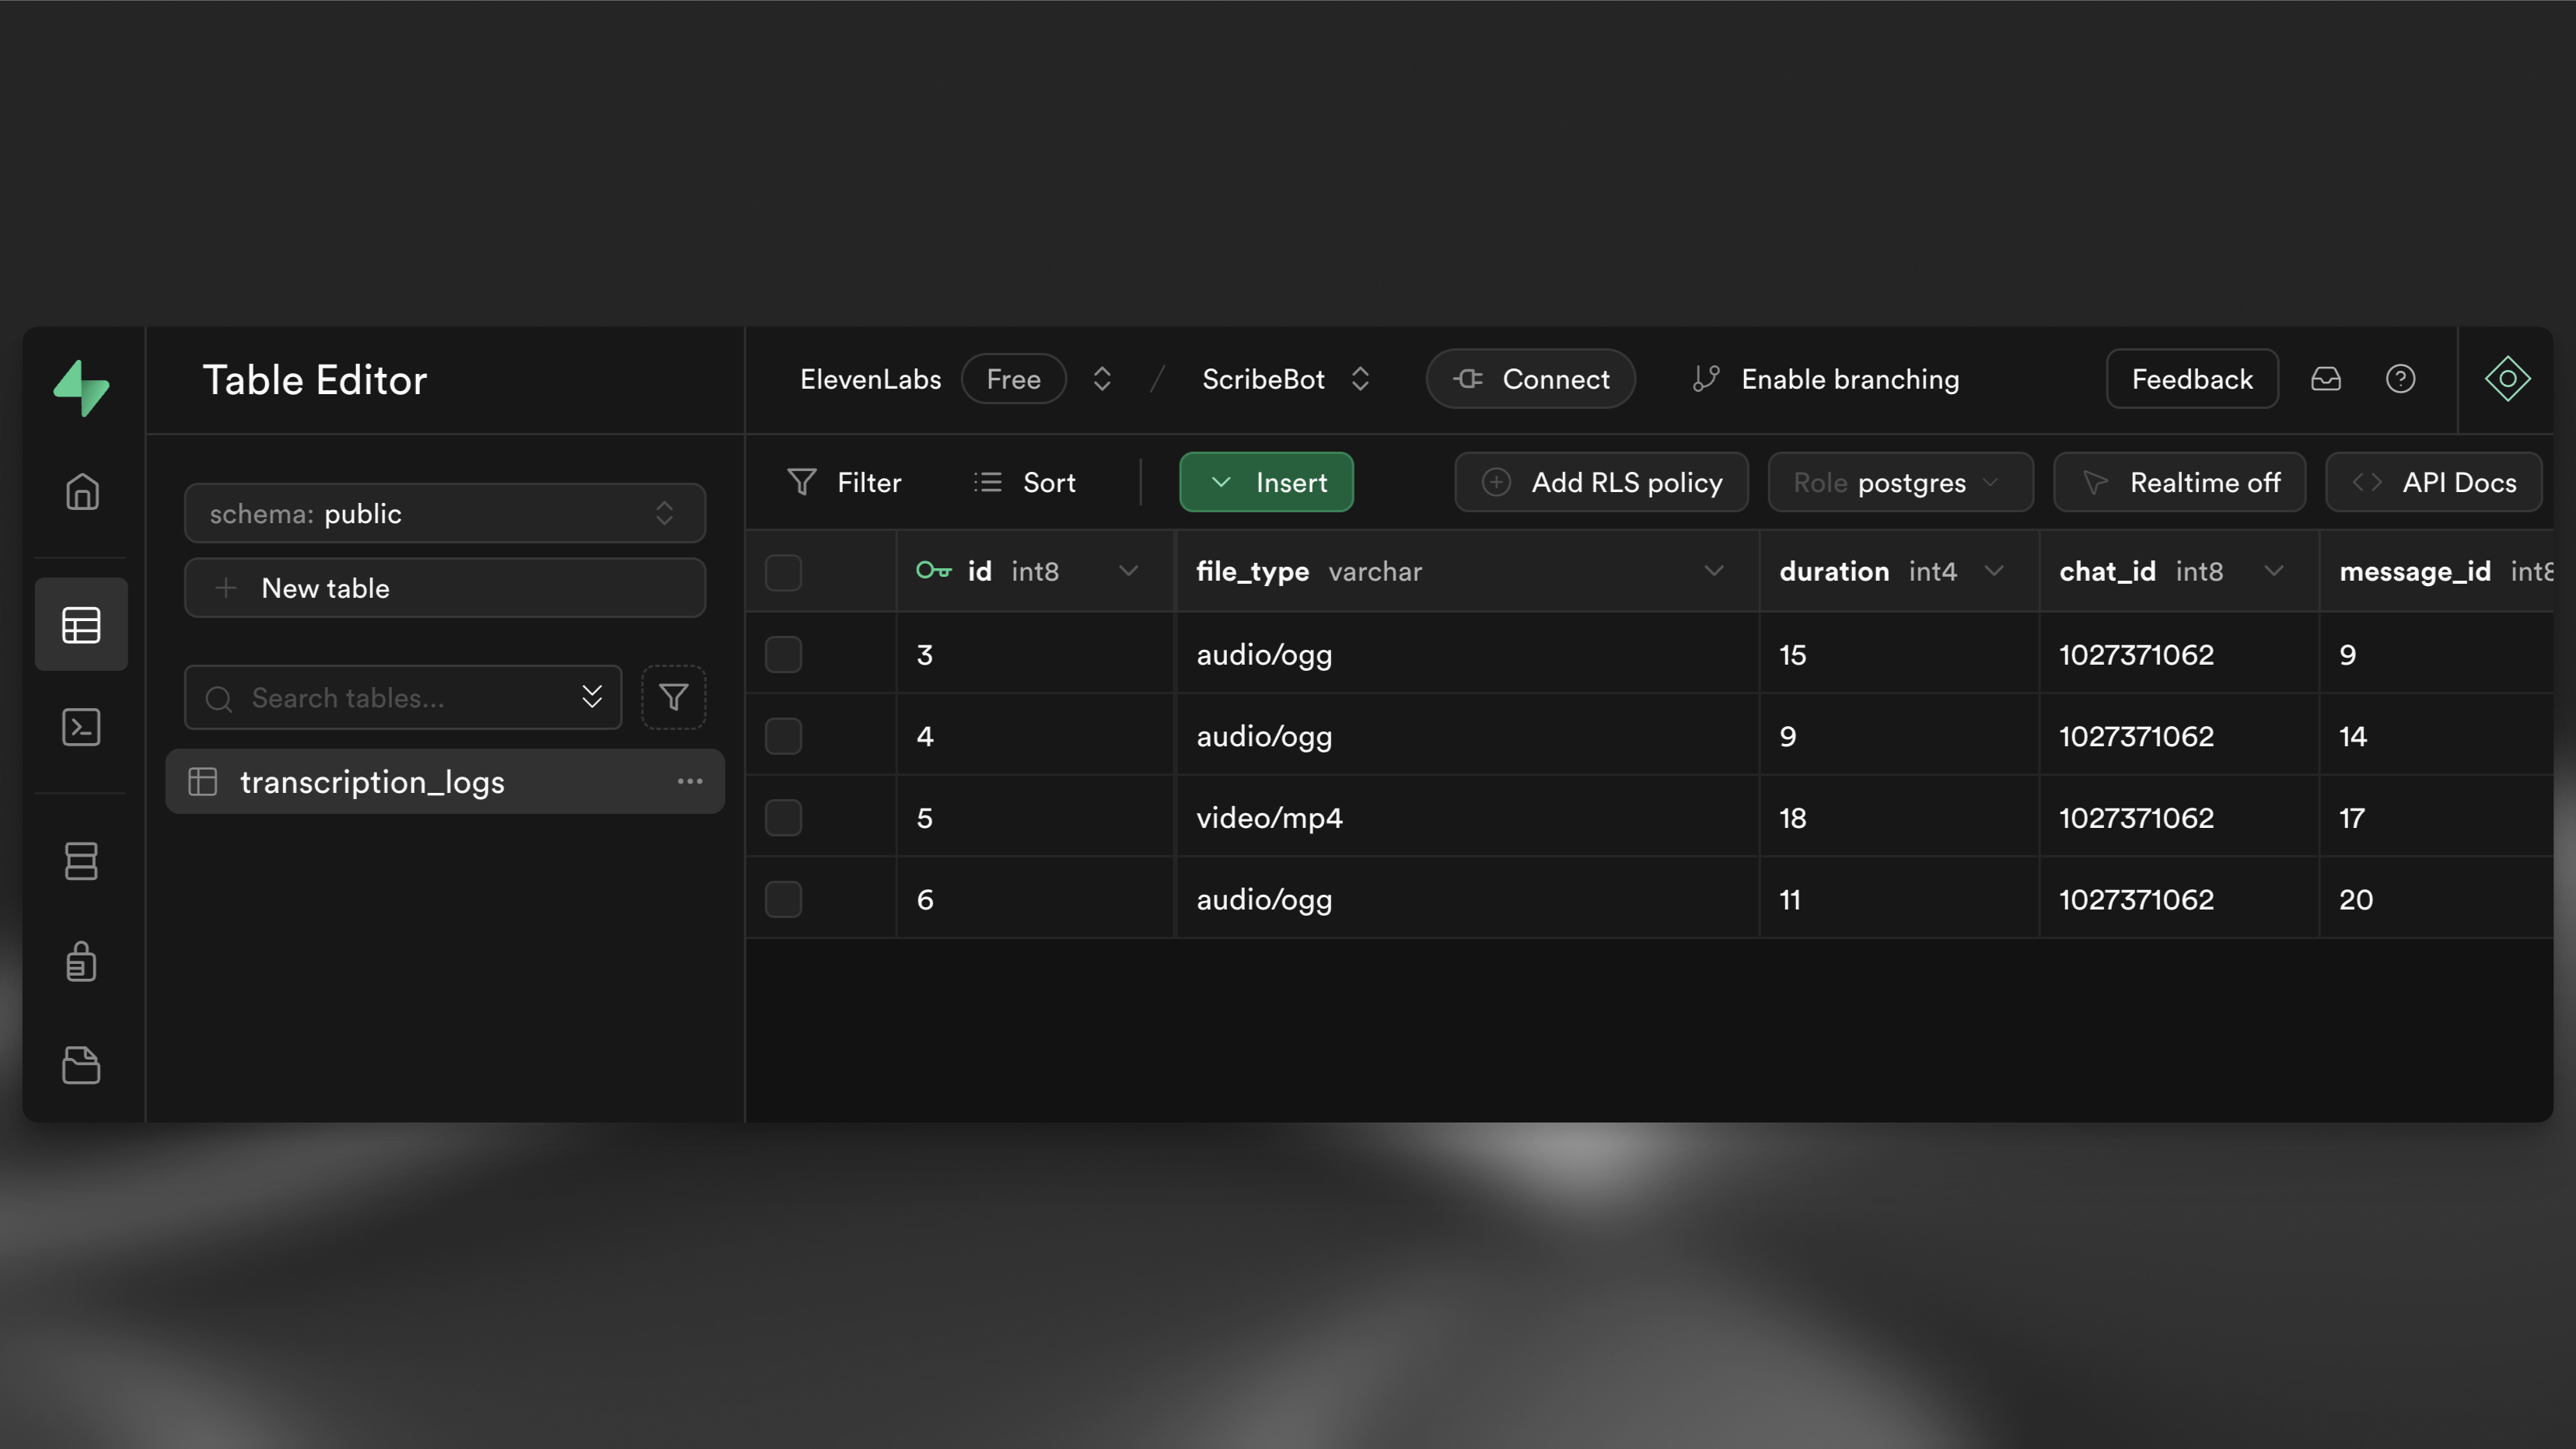
在你看到回复里的文字记录后,返回 Supabase 控制面板中的表格编辑器,你应该会在 transcription_logs 表里看到一行新数据。
🌐 After you see the transcript as a reply, navigate back to your table editor in the Supabase dashboard and you should see a new row in your transcription_logs table.