为你的文档添加生成式问答
Learn how to build a ChatGPT-style doc search powered using our headless search toolkit.
Supabase 提供了一个 无头搜索工具包,用于向你的文档中添加“生成式问答”。这个工具包是“无头”的,所以你可以将它集成到现有网站中,并根据你的网站主题进行样式调整。
🌐 Supabase provides a Headless Search Toolkit for adding "Generative Q&A" to your documentation. The toolkit is "headless", so that you can integrate it into your existing website and style it to match your website theme.
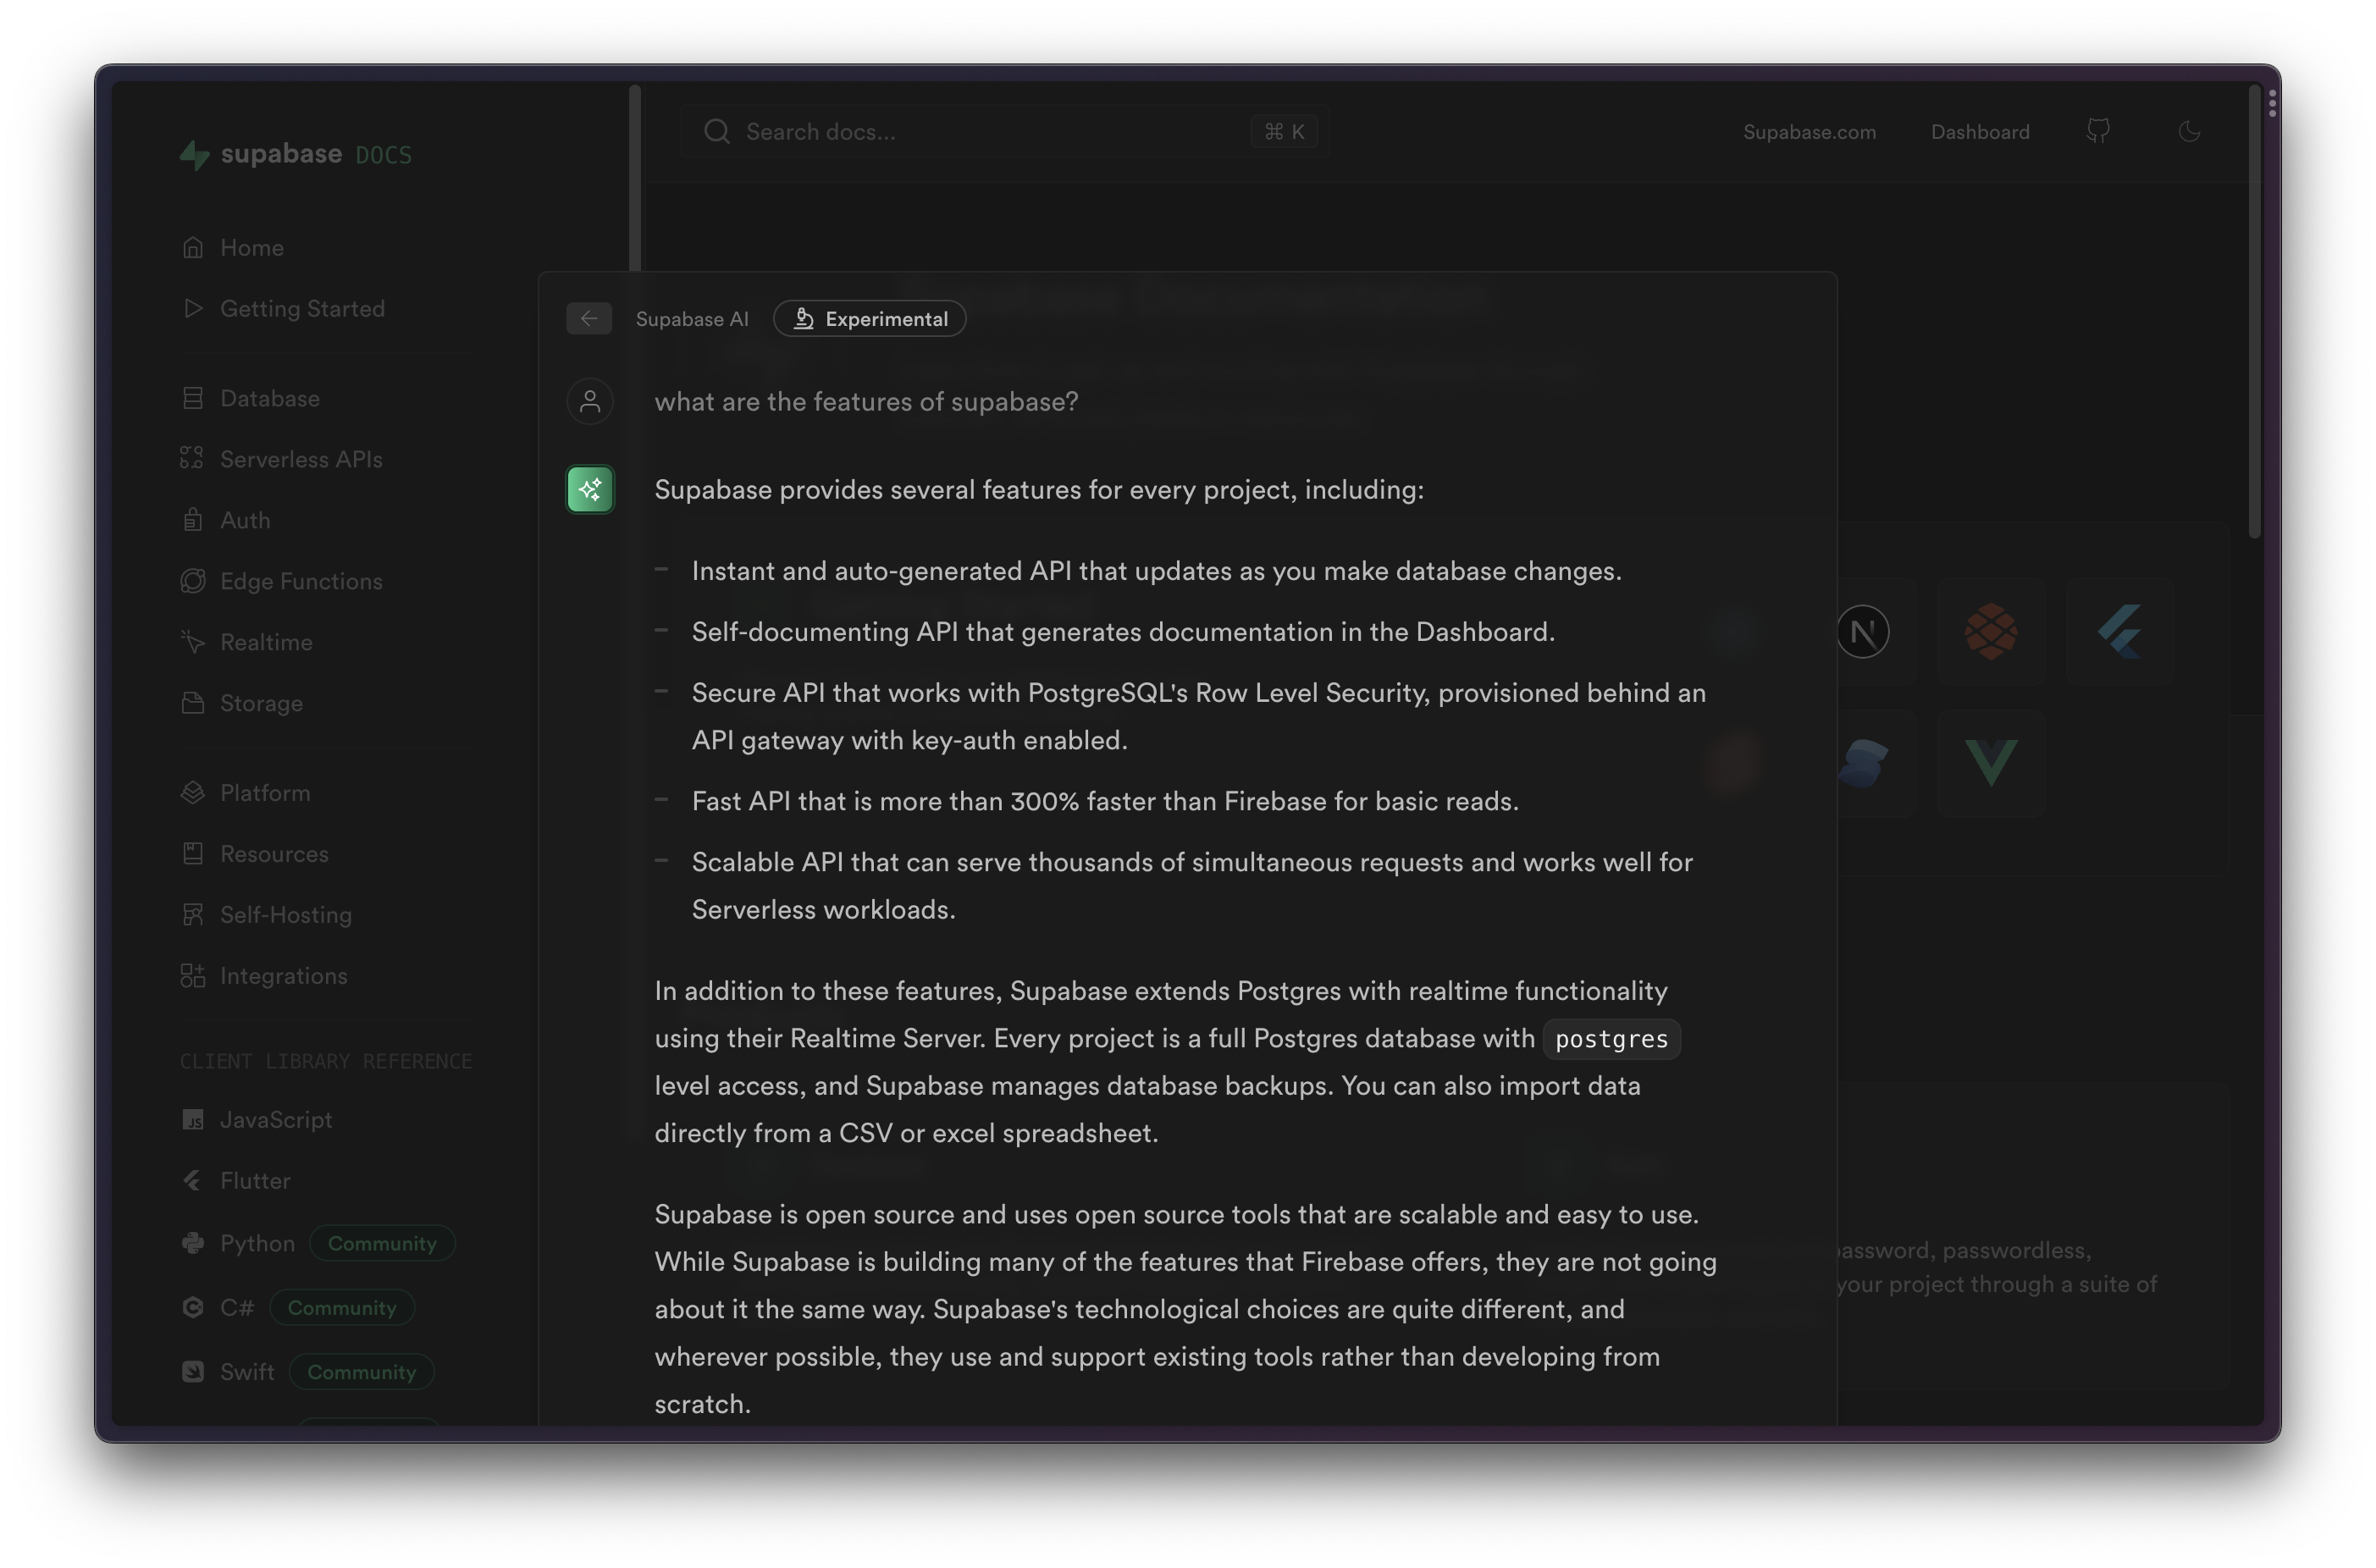
你可以通过 Supabase 文档来看看这是怎么工作的。输入 cmd+k 并问,例如,“Supabase 有哪些功能?”。你会看到响应是使用文档中提供的信息流式返回的:
🌐 You can see how this works with the Supabase docs. Enter cmd+k and ask, for example, "what are the features of Supabase?". You will see that the response is streamed back using the information provided in the docs:
技术栈 #
🌐 Tech stack
- Supabase:数据库与边缘函数。
- OpenAI:嵌入和补全。
- GitHub Actions:用来导入你的 Markdown 文档。
工具包 #
🌐 Toolkit
这个工具包由两部分组成:
🌐 This toolkit consists of 2 parts:
- 你可以在自己的组织中部署的 无头向量搜索 模板。
- 一个 GitHub Action,可以读取你的 Markdown 文件,把它们转换成嵌入,然后存储到你的数据库里。
用法 #
🌐 Usage
在你的文档中构建相似性搜索有三个步骤:
🌐 There are 3 steps to build similarity search inside your documentation:
- 准备你的数据库。
- 获取你的文档。
- 添加一个搜索界面。
准备你的数据库 #
🌐 Prepare your database
准备时,创建一个 新的 Supabase 项目 并保存数据库和 API 凭证,你可以在项目的 设置 中找到这些信息。
🌐 To prepare, create a new Supabase project and store the database and API credentials, which you can find in the project settings.
现在我们可以使用 Headless Vector Search 的说明来设置数据库:
🌐 Now we can use the Headless Vector Search instructions to set up the database:
- 将仓库克隆到你的本地机器:
git clone git@github.com:supabase/headless-vector-search.git - 将仓库链接到你的远程项目:
supabase link --project-ref XXX - 应用数据库迁移:
supabase db push - 将你的 OpenAI 密钥设置为一个秘密:
supabase secrets set OPENAI_API_KEY=sk-xxx - 部署边缘功能:
supabase functions deploy --no-verify-jwt - 通过 Supabase 仪表板 设置 >
API Settings>Exposed schemas,通过 API 公开docs架构
获取你的文档 #
🌐 Ingest your documentation
现在我们需要把你的文档作为嵌入推送到数据库里。你可以手动操作,但为了更方便,我们创建了一个 GitHub Action,每次有 Pull Request 时它都可以更新你的数据库。
🌐 Now we need to push your documentation into the database as embeddings. You can do this manually, but to make it easier we've created a GitHub Action which can update your database every time there is a Pull Request.
在你的知识库中,创建一个名为 .github/workflows/generate_embeddings.yml 的新操作,内容如下:
🌐 In your knowledge base repository, create a new action called .github/workflows/generate_embeddings.yml with the following content:
1name: 'generate_embeddings'2on: # run on main branch changes3 push:4 branches:5 - main67jobs:8 generate:9 runs-on: ubuntu-latest10 steps:11 - uses: actions/checkout@v312 - uses: supabase/embeddings-generator@v0.0.x # Update this to the latest version.13 with:14 supabase-url: 'https://your-project-ref.supabase.co' # Update this to your project URL.15 supabase-secret-key: ${{ secrets.SUPABASE_SECRET_KEY }}16 openai-key: ${{ secrets.OPENAI_API_KEY }}17 docs-root-path: 'docs' # the path to the root of your md(x) files确保选择最新版本,并在你的仓库设置里把 SUPABASE_SECRET_KEY 和 OPENAI_API_KEY 设置为仓库机密(设置 > 机密 > actions)。
🌐 Make sure to choose the latest version, and set your SUPABASE_SECRET_KEY and OPENAI_API_KEY as repository secrets in your repo settings (settings > secrets > actions).
添加一个搜索界面 #
🌐 Add a search interface
现在在你的文档里,你需要创建一个搜索界面。因为这是一个无头界面,你可以用任何语言来使用它。唯一的要求是你需要把用户的查询发送到 query Edge Function,它会从 OpenAI 流式返回一个答案。它可能看起来像这样:
🌐 Now inside your docs, you need to create a search interface. Because this is a headless interface, you can use it with any language. The only requirement is that you send the user query to the query Edge Function, which will stream an answer back from OpenAI. It might look something like this:
1const onSubmit = (e: Event) => {2 e.preventDefault()3 answer.value = ""4 isLoading.value = true56 const query = new URLSearchParams({ query: inputRef.current!.value })7 const projectUrl = `https://your-project-ref.supabase.co/functions/v1`8 const queryURL = `${projectUrl}/${query}`9 const eventSource = new EventSource(queryURL)1011 eventSource.addEventListener("error", (err) => {12 isLoading.value = false13 console.error(err)14 })1516 eventSource.addEventListener("message", (e: MessageEvent) => {17 isLoading.value = false1819 if (e.data === "[DONE]") {20 eventSource.close()21 return22 }2324 const completionResponse: CreateCompletionResponse = JSON.parse(e.data)25 const text = completionResponse.choices[0].text2627 answer.value += text28 });2930 isLoading.value = true31}资源 #
🌐 Resources
- 了解一下我们是如何构建 Supabase 文档的 ChatGPT 的。
- 查看 pgvector 文档,了解 嵌入和向量相似度
- 看看如何从头开始用 Next.js 构建这样的东西。