用 LinkedIn 登录
要在你的项目中启用 LinkedIn 登录,你需要创建一个 LinkedIn OAuth 应用,并将应用的凭证添加到你的 Supabase 仪表板上。
🌐 To enable LinkedIn Auth for your project, you need to set up a LinkedIn OAuth application and add the application credentials to your Supabase Dashboard.
概览 #
🌐 Overview
为你的应用设置 LinkedIn 登录包括三个部分:
🌐 Setting up LinkedIn logins for your application consists of 3 parts:
- 在 LinkedIn 开发者控制台 创建并配置一个 LinkedIn 项目和应用。
- 将你的 LinkedIn (OIDC)
client_id和client_secret添加到你的 Supabase 项目 中。 - 将登录代码添加到你的 Supabase JS 客户端应用 中。
访问你的 LinkedIn 开发者账户 #
🌐 Access your LinkedIn Developer account
- 前往 LinkedIn 开发者仪表板。
- 登录(如有必要)

找到你的回调网址 #
🌐 Find your callback URL
下一步需要一个回调 URL,看起来像这样:https://<project-ref>.supabase.co/auth/v1/callback
- 前往你的 Supabase 项目仪表板
- 点击左侧边栏的
Authentication图标 - 在配置部分点击
Sign In / Providers - 点击手风琴列表中的 LinkedIn 展开,你就会找到你的 回调 URL,你可以点击
Copy将其复制到剪贴板
本地开发 #
🌐 Local development
在本地使用 Supabase CLI 测试 OAuth 时,确保你的 OAuth 提供商已配置本地 Supabase Auth 回调 URL:
🌐 When testing OAuth locally with the Supabase CLI, ensure your OAuth provider is configured with the local Supabase Auth callback URL:
http://localhost:54321/auth/v1/callback
如果这个回调 URL 缺失或配置错误,OAuth 登录可能会失败,或者在本地开发时无法正确跳转。
🌐 If this callback URL is missing or misconfigured, OAuth sign-in may fail or not redirect correctly during local development.
有关更多详情,请查看本地开发文档。
🌐 See the local development docs for more details.
要在本地使用 Supabase CLI 测试 OAuth,请参阅本地开发文档。
🌐 For testing OAuth locally with the Supabase CLI see the local development docs.
创建一个 LinkedIn OAuth 应用 #
🌐 Create a LinkedIn OAuth app
- 前往 LinkedIn 开发者仪表板。
- 点击右上角的
Create App - 请输入你的
LinkedIn Page和App Logo - 保存你的应用
- 从顶部菜单点击
Products - 寻找
Sign In with LinkedIn using OpenID Connect并点击请求访问 - 从顶部菜单点击
Auth - 把你的
Redirect URL加到Authorized Redirect URLs for your app部分 - 复制并保存你新生成的
Client ID - 复制并保存你新生成的
Client Secret
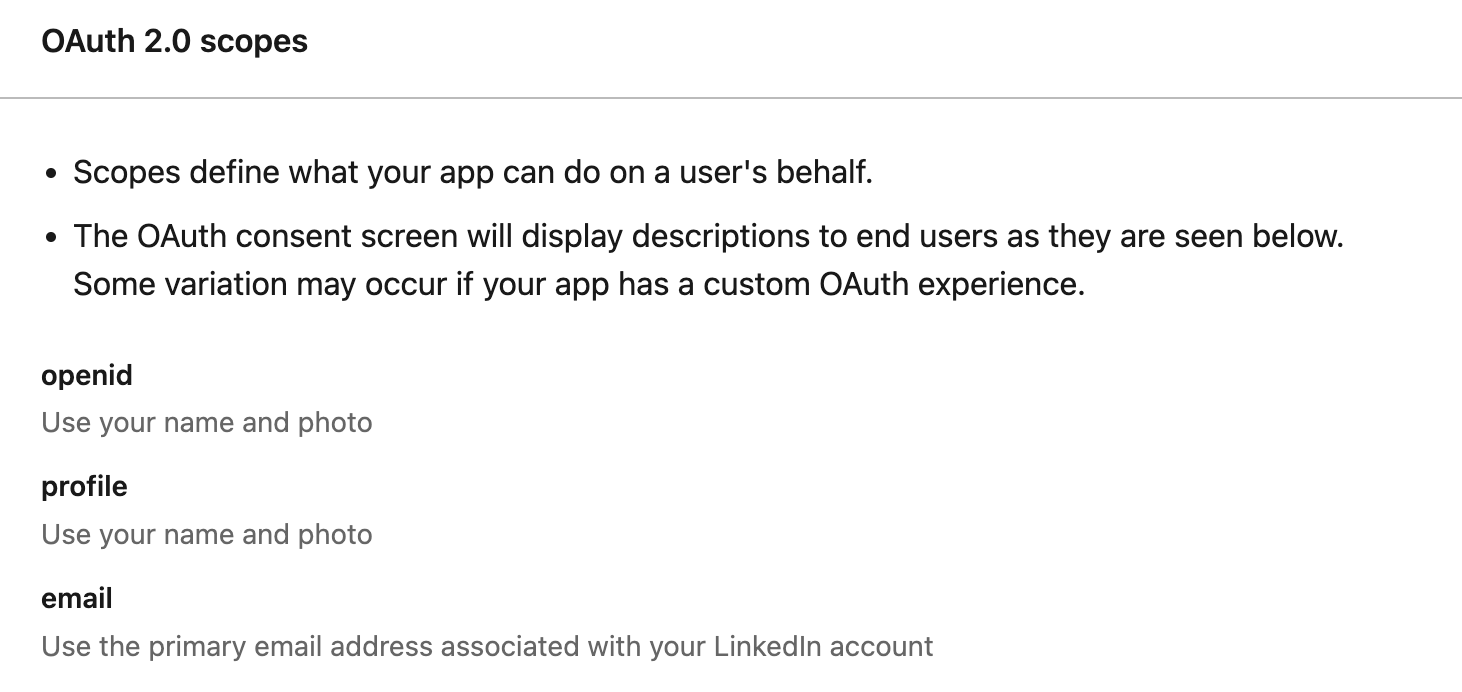
确保在 Auth 屏幕底部的 OAuth 2.0 范围下添加了适当的范围。
🌐 Ensure that the appropriate scopes have been added under OAuth 2.0 Scopes at the bottom of the Auth screen.
在你的 Supabase 项目中输入你的 LinkedIn(OIDC)凭证 #
🌐 Enter your LinkedIn (OIDC) credentials into your Supabase project
- 前往你的 Supabase 项目仪表板
- 在左侧边栏,点击
Authentication图标(靠近顶部) - 在配置部分点击
Providers - 从手风琴列表中点击 LinkedIn (OIDC) 来展开,然后将 LinkedIn (OIDC) 启用 切换为开启
- 输入你在上一步保存的 LinkedIn (OIDC) 客户端 ID 和 LinkedIn (OIDC) 客户端密钥
- 点击
Save
你也可以使用管理 API 配置 LinkedIn(OIDC)认证提供者:
🌐 You can also configure the LinkedIn (OIDC) auth provider using the Management API:
1# Get your access token from https://supabase.com/dashboard/account/tokens2export SUPABASE_ACCESS_TOKEN="your-access-token"3export PROJECT_REF="your-project-ref"45# Configure LinkedIn (OIDC) auth provider6curl -X PATCH "https://api.supabase.com/v1/projects/$PROJECT_REF/config/auth" \7 -H "Authorization: Bearer $SUPABASE_ACCESS_TOKEN" \8 -H "Content-Type: application/json" \9 -d '{10 "external_linkedin_oidc_enabled": true,11 "external_linkedin_oidc_client_id": "your-linkedin-client-id",12 "external_linkedin_oidc_secret": "your-linkedin-client-secret"13 }'在你的客户端应用中添加登录代码 #
🌐 Add login code to your client app
确保你在以下代码中使用了正确的 supabase 客户端。
🌐 Make sure you're using the right supabase client in the following code.
如果你没有使用服务器端渲染或基于 Cookie 的认证,你可以直接从 @supabase/supabase-js 使用 createClient。如果你在使用服务器端渲染,请查看 服务器端认证指南 获取创建 Supabase 客户端的说明。
🌐 If you're not using Server-Side Rendering or cookie-based Auth, you can directly use the createClient from @supabase/supabase-js. If you're using Server-Side Rendering, see the Server-Side Auth guide for instructions on creating your Supabase client.
当你的用户登录时,用 linkedin_oidc 作为 provider 调用 signInWithOAuth() :
🌐 When your user signs in, call signInWithOAuth() with linkedin_oidc as the provider:
1import { createClient } from '@supabase/supabase-js'23const supabase = createClient('https://your-project-id.supabase.co', 'sb_publishable_...')45// ---cut---6async function signInWithLinkedIn() {7 const { data, error } = await supabase.auth.signInWithOAuth({8 provider: 'linkedin_oidc',9 })10}以 PKCE 流程为例,比如在服务端认证中,你需要一个额外的步骤来处理代码交换。在调用 signInWithOAuth 时,提供一个指向回调路由的 redirectTo URL。这个重定向 URL 应该添加到你的 重定向允许列表 中。
🌐 For a PKCE flow, for example in Server-Side Auth, you need an extra step to handle the code exchange. When calling signInWithOAuth, provide a redirectTo URL which points to a callback route. This redirect URL should be added to your redirect allow list.
在浏览器中,signInWithOAuth 会自动重定向到 OAuth 提供商的认证端点,然后再重定向到你的端点。
🌐 In the browser, signInWithOAuth automatically redirects to the OAuth provider's authentication endpoint, which then redirects to your endpoint.
1import { createClient, type Provider } from '@supabase/supabase-js';2const supabase = createClient('https://your-project-id.supabase.co', 'sb_publishable_...')3const provider = 'provider' as Provider45// ---cut---6await supabase.auth.signInWithOAuth({7 provider,8 options: {9 redirectTo: `http://example.com/auth/callback`,10 },11})在回调端点,处理代码交换以保存用户会话。
🌐 At the callback endpoint, handle the code exchange to save the user session.
在 app/auth/callback/route.ts 创建一个新文件,并填入以下内容:
🌐 Create a new file at app/auth/callback/route.ts and populate with the following:
1import { NextResponse } from 'next/server'23// The client you created from the Server-Side Auth instructions4import { createClient } from '@/utils/supabase/server'56export async function GET(request: Request) {7 const { searchParams, origin } = new URL(request.url)8 const code = searchParams.get('code')9 // if "next" is in param, use it as the redirect URL10 let next = searchParams.get('next') ?? '/'11 if (!next.startsWith('/')) {12 // if "next" is not a relative URL, use the default13 next = '/'14 }1516 if (code) {17 const supabase = await createClient()18 const { error } = await supabase.auth.exchangeCodeForSession(code)19 if (!error) {20 const forwardedHost = request.headers.get('x-forwarded-host') // original origin before load balancer21 const isLocalEnv = process.env.NODE_ENV === 'development'22 if (isLocalEnv) {23 // we can be sure that there is no load balancer in between, so no need to watch for X-Forwarded-Host24 return NextResponse.redirect(`${origin}${next}`)25 } else if (forwardedHost) {26 return NextResponse.redirect(`https://${forwardedHost}${next}`)27 } else {28 return NextResponse.redirect(`${origin}${next}`)29 }30 }31 }3233 // return the user to an error page with instructions34 return NextResponse.redirect(`${origin}/auth/auth-code-error`)35}当你的用户注销时,调用 signOut() 来将他们从浏览器会话中移除,并清除 localStorage 中的任何对象:
🌐 When your user signs out, call signOut() to remove them from the browser session and any objects from localStorage:
1import { createClient } from '@supabase/supabase-js'23const supabase = createClient('https://your-project-id.supabase.co', 'sb_publishable_...')45// ---cut---6async function signOut() {7 const { error } = await supabase.auth.signOut()8}领英开放ID连接 (OIDC) #
🌐 LinkedIn Open ID Connect (OIDC)
我们正在用新的 LinkedIn (OIDC) 提供程序替换原来的 LinkedIn 提供程序,以支持 LinkedIn 最近对 OAuth APIs 的更改。新提供程序采用了 Open ID Connect 标准。鉴于这一变化,我们已禁用对 LinkedIn 提供程序的编辑,并将于 2024 年 1 月 4 日起移除它。对于 2023 年 8 月 1 日之前创建的 LinkedIn OAuth 应用,开发者需要 按照上面步骤 创建一个新的 OAuth 应用,并将凭据从 LinkedIn 提供程序迁移到 LinkedIn (OIDC) 提供程序。或者,你也可以直接到 Products 部分,将新发布的 Sign In with LinkedIn using OpenID Connect 添加到你现有的 OAuth 应用中。
🌐 We are replacing the LinkedIn provider with a new LinkedIn (OIDC) provider to support recent changes to the LinkedIn OAuth APIs. The new provider uses the Open ID Connect standard. In view of this change, we have disabled edits on the LinkedIn provider and will be removing it effective 4th January 2024. Developers with LinkedIn OAuth Applications created prior to 1st August 2023 should create a new OAuth application via the steps outlined above and migrate their credentials from the LinkedIn provider to the LinkedIn (OIDC) provider. Alternatively, you can also head to the Products section and add the newly releaseSign In with LinkedIn using OpenID Connect to your existing OAuth application.
使用 Supabase CLI 测试他们的 LinkedIn OAuth 应用的开发者也应该更新他们的 config.toml 来使用新的提供者:
🌐 Developers using the Supabase CLI to test their LinkedIn OAuth application should also update their config.toml to make use of the new provider:
1[auth.external.linkedin_oidc]2enabled = true3client_id = ...4secret = ...如果你对这个变化有任何疑问,随时联系支持团队。
🌐 Do reach out to support if you have any concerns around this change.
资源 #
🌐 Resources