使用 WorkOS 的 SSO 和社交登录
使用 WorkOS 社交登录 #
🌐 Use Social Login with WorkOS
第1步:创建一个 WorkOS 组织 #
🌐 Step 1. Create a WorkOS organization
登录 WorkOS 仪表板,然后访问“组织”标签以创建一个组织。
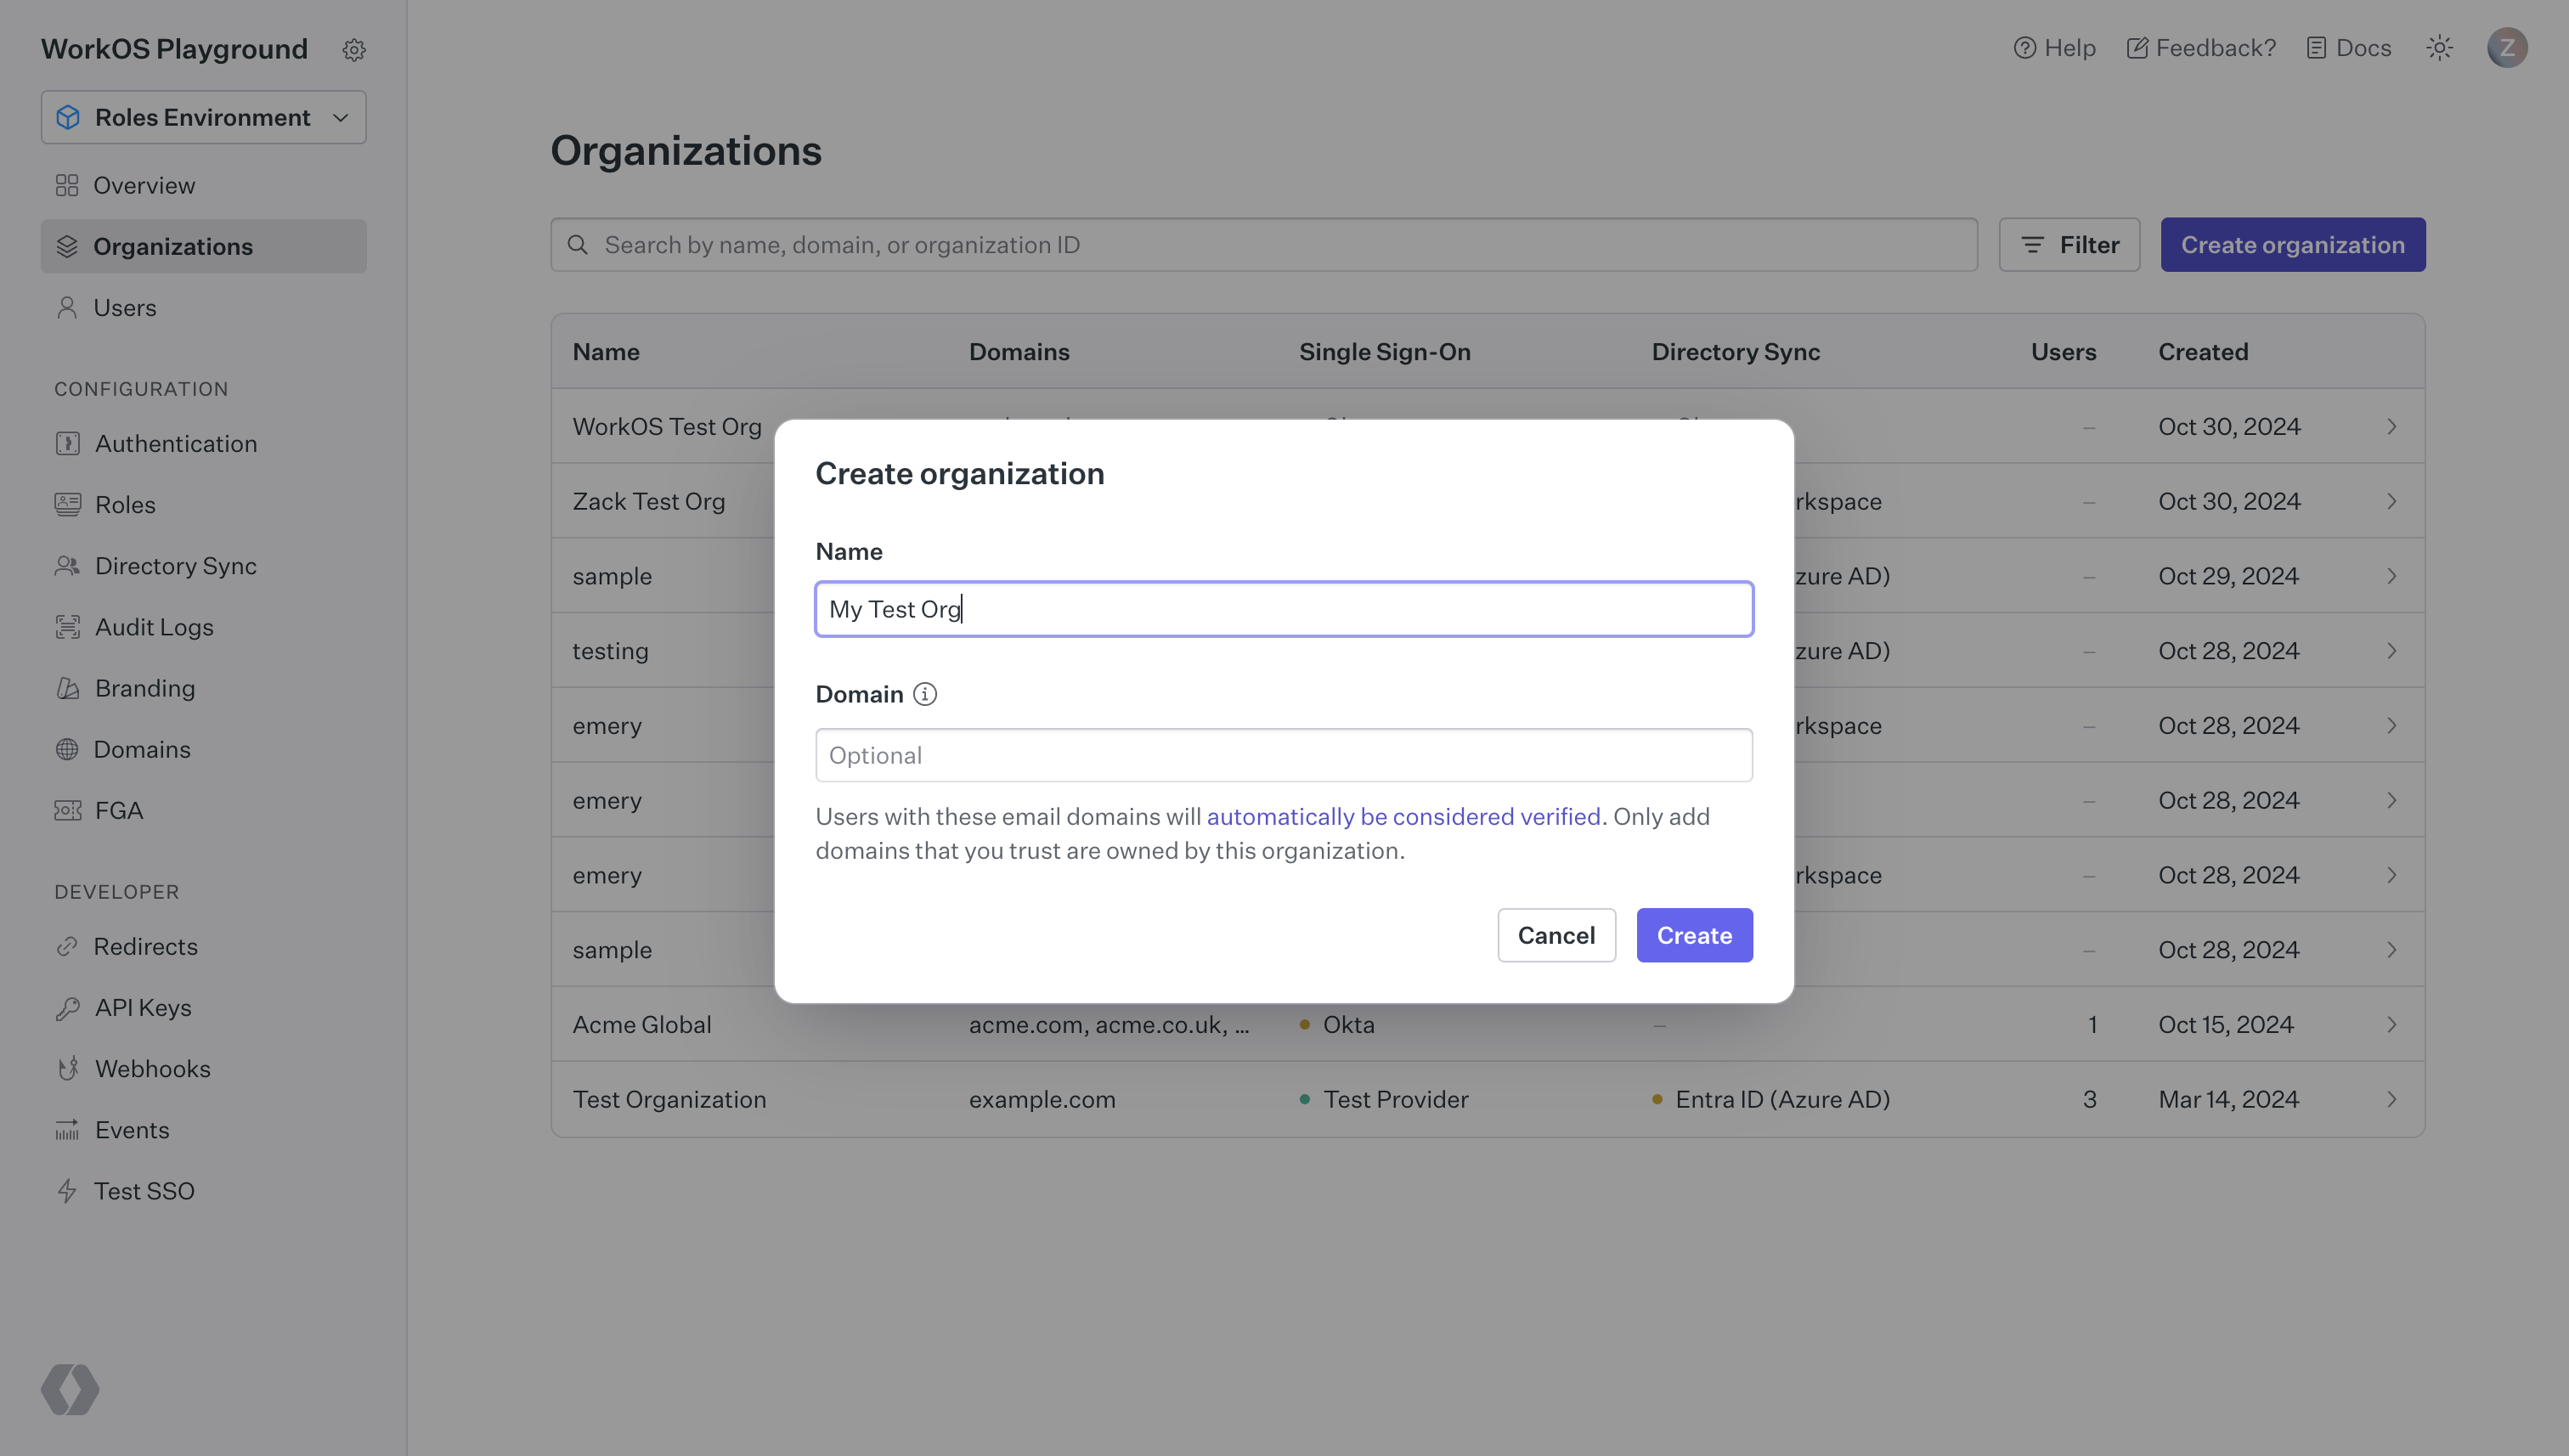
🌐 Log in to the WorkOS dashboard and visit the Organizations tab to create an organization.
或者,你可以通过 WorkOS API 创建一个组织。
🌐 Alternatively, you can create an organization via the WorkOS API.
步骤2. 获取你的 Client ID 和 WORKOS_API_KEY#
🌐 Step 2. Obtain your Client ID and WORKOS_API_KEY values
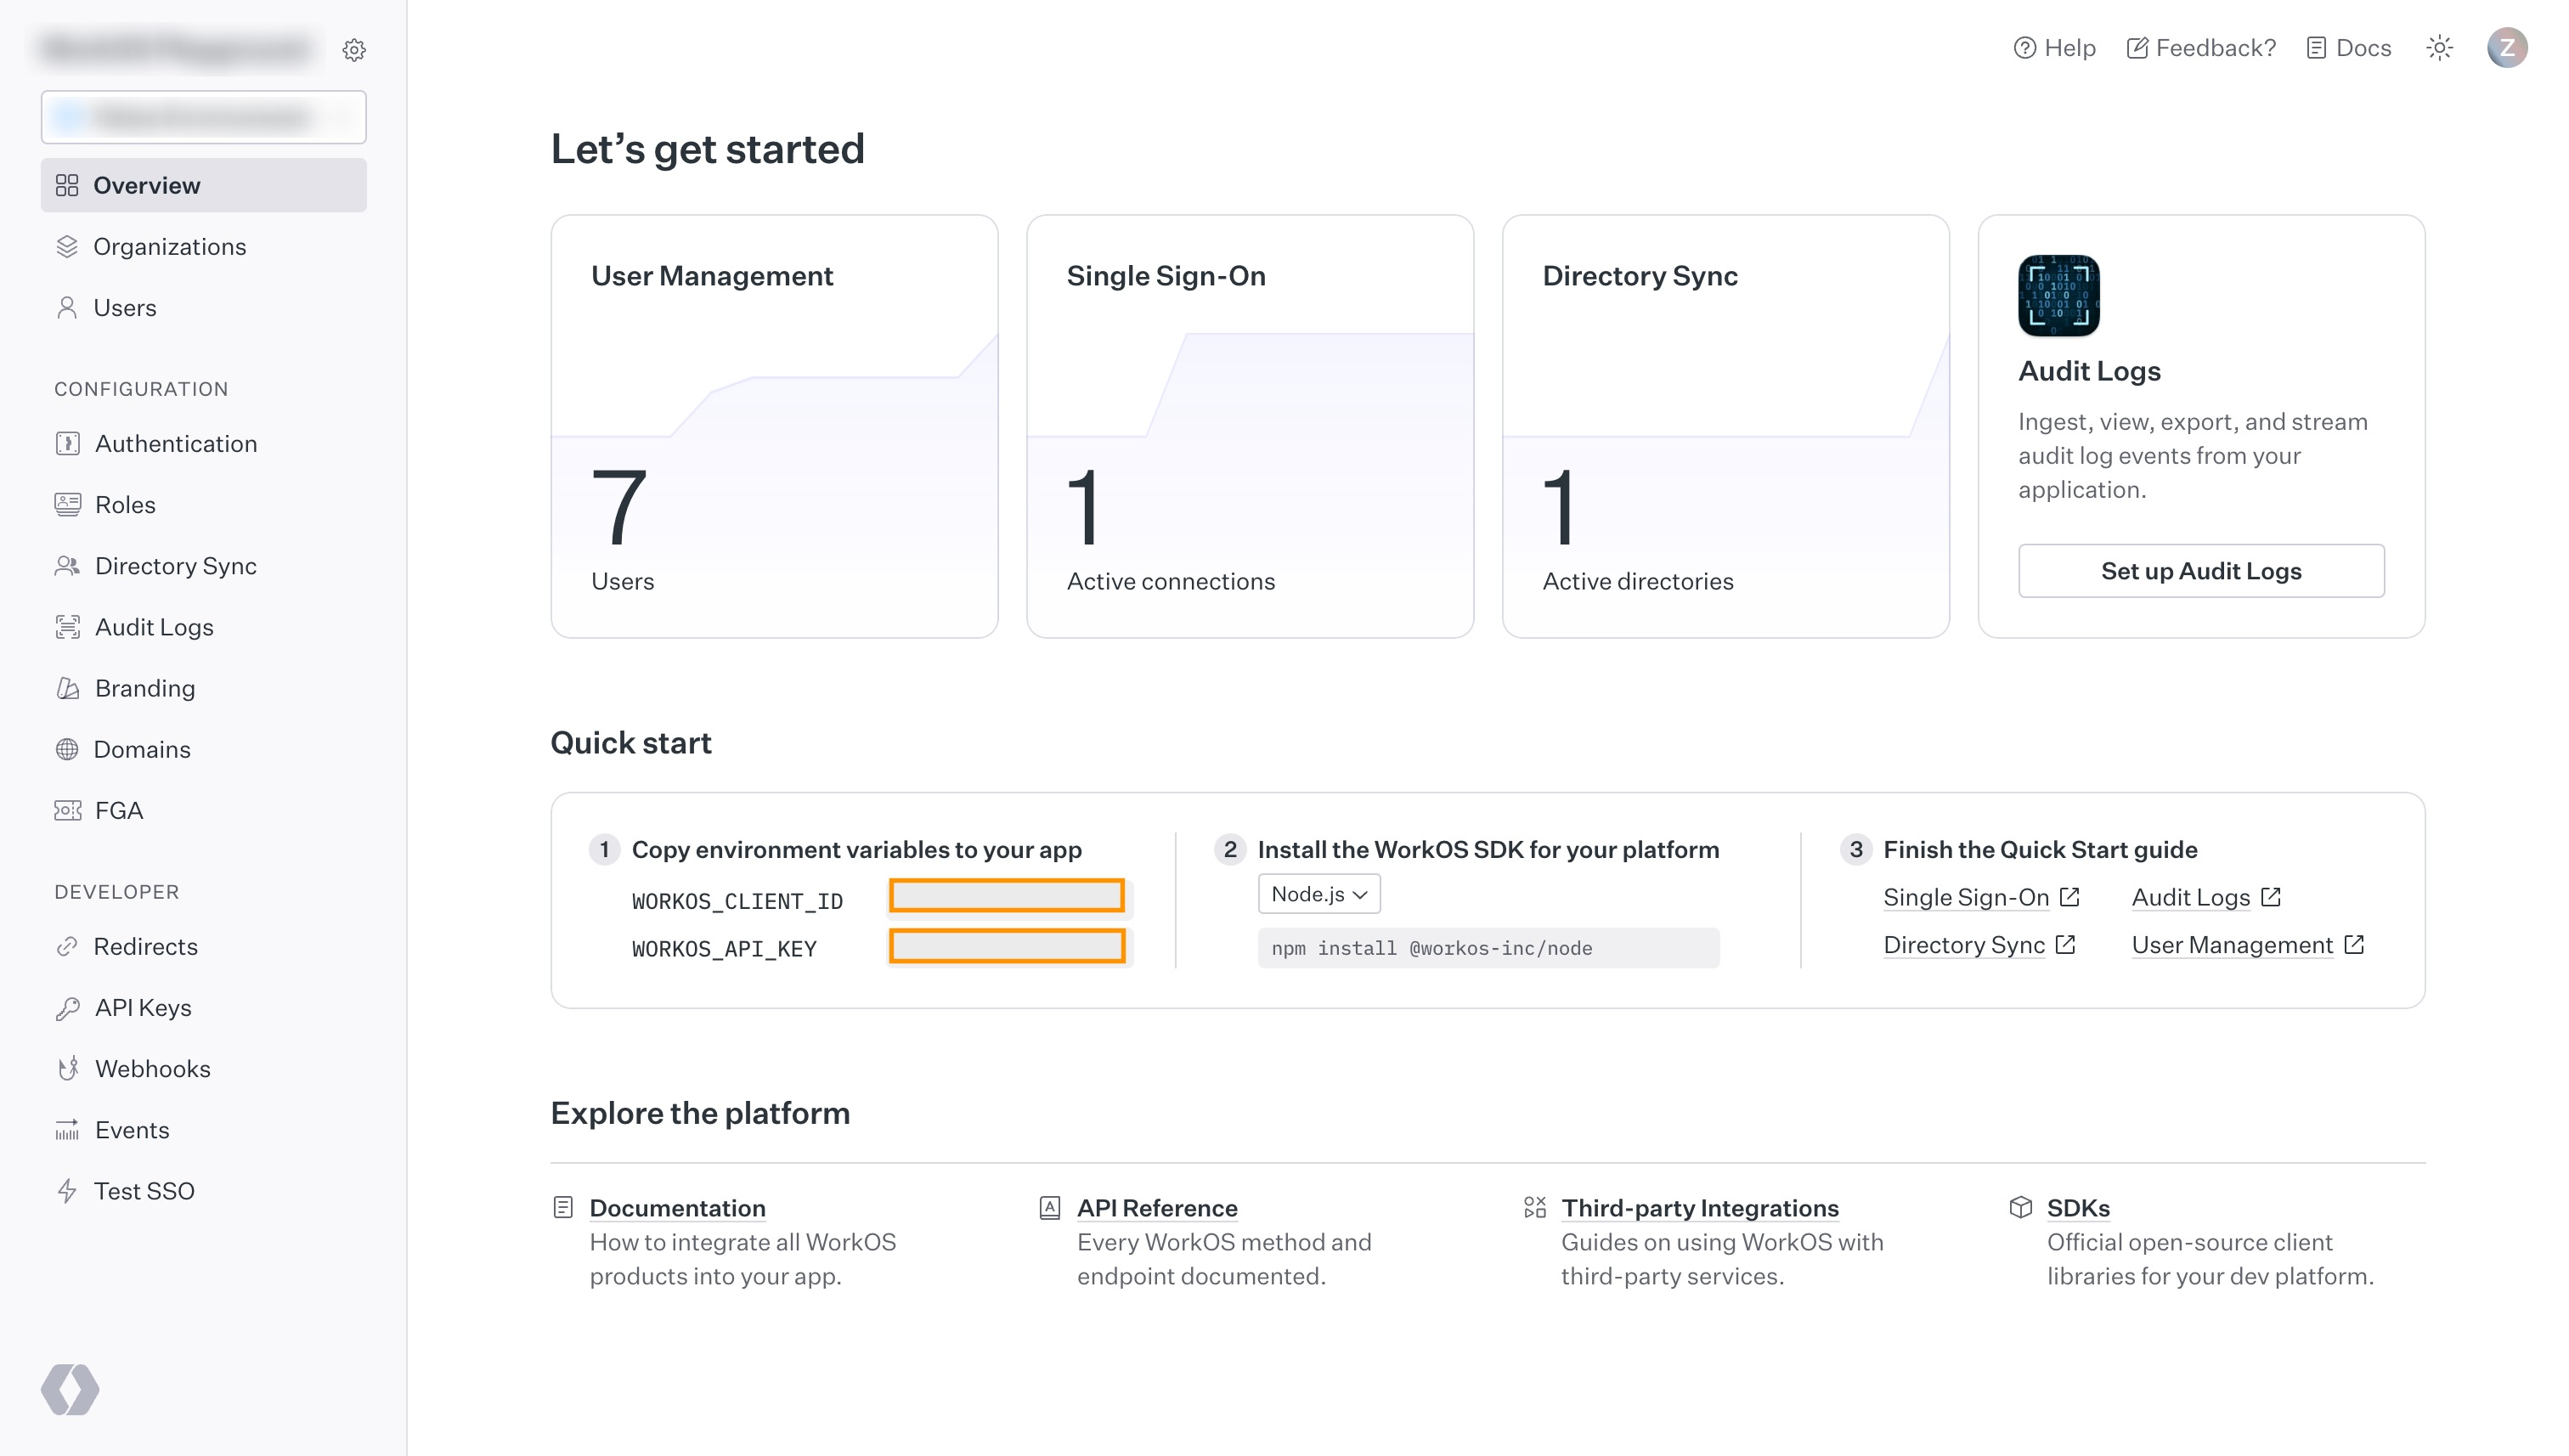
访问 WorkOS 控制面板 的入门页面。从快速入门面板中复制以下数值:
🌐 Visit the getting started page of the WorkOS Dashboard. Copy the following values from the Quickstart panel:
WORKOS_CLIENT_IDWORKOS_API_KEY
你必须登录才能查看这些数值。
🌐 You must be signed in to see these values.
步骤 3. 将你的 WorkOS 凭证添加到你的 Supabase 项目中 #
🌐 Step 3. Add your WorkOS credentials to your Supabase project
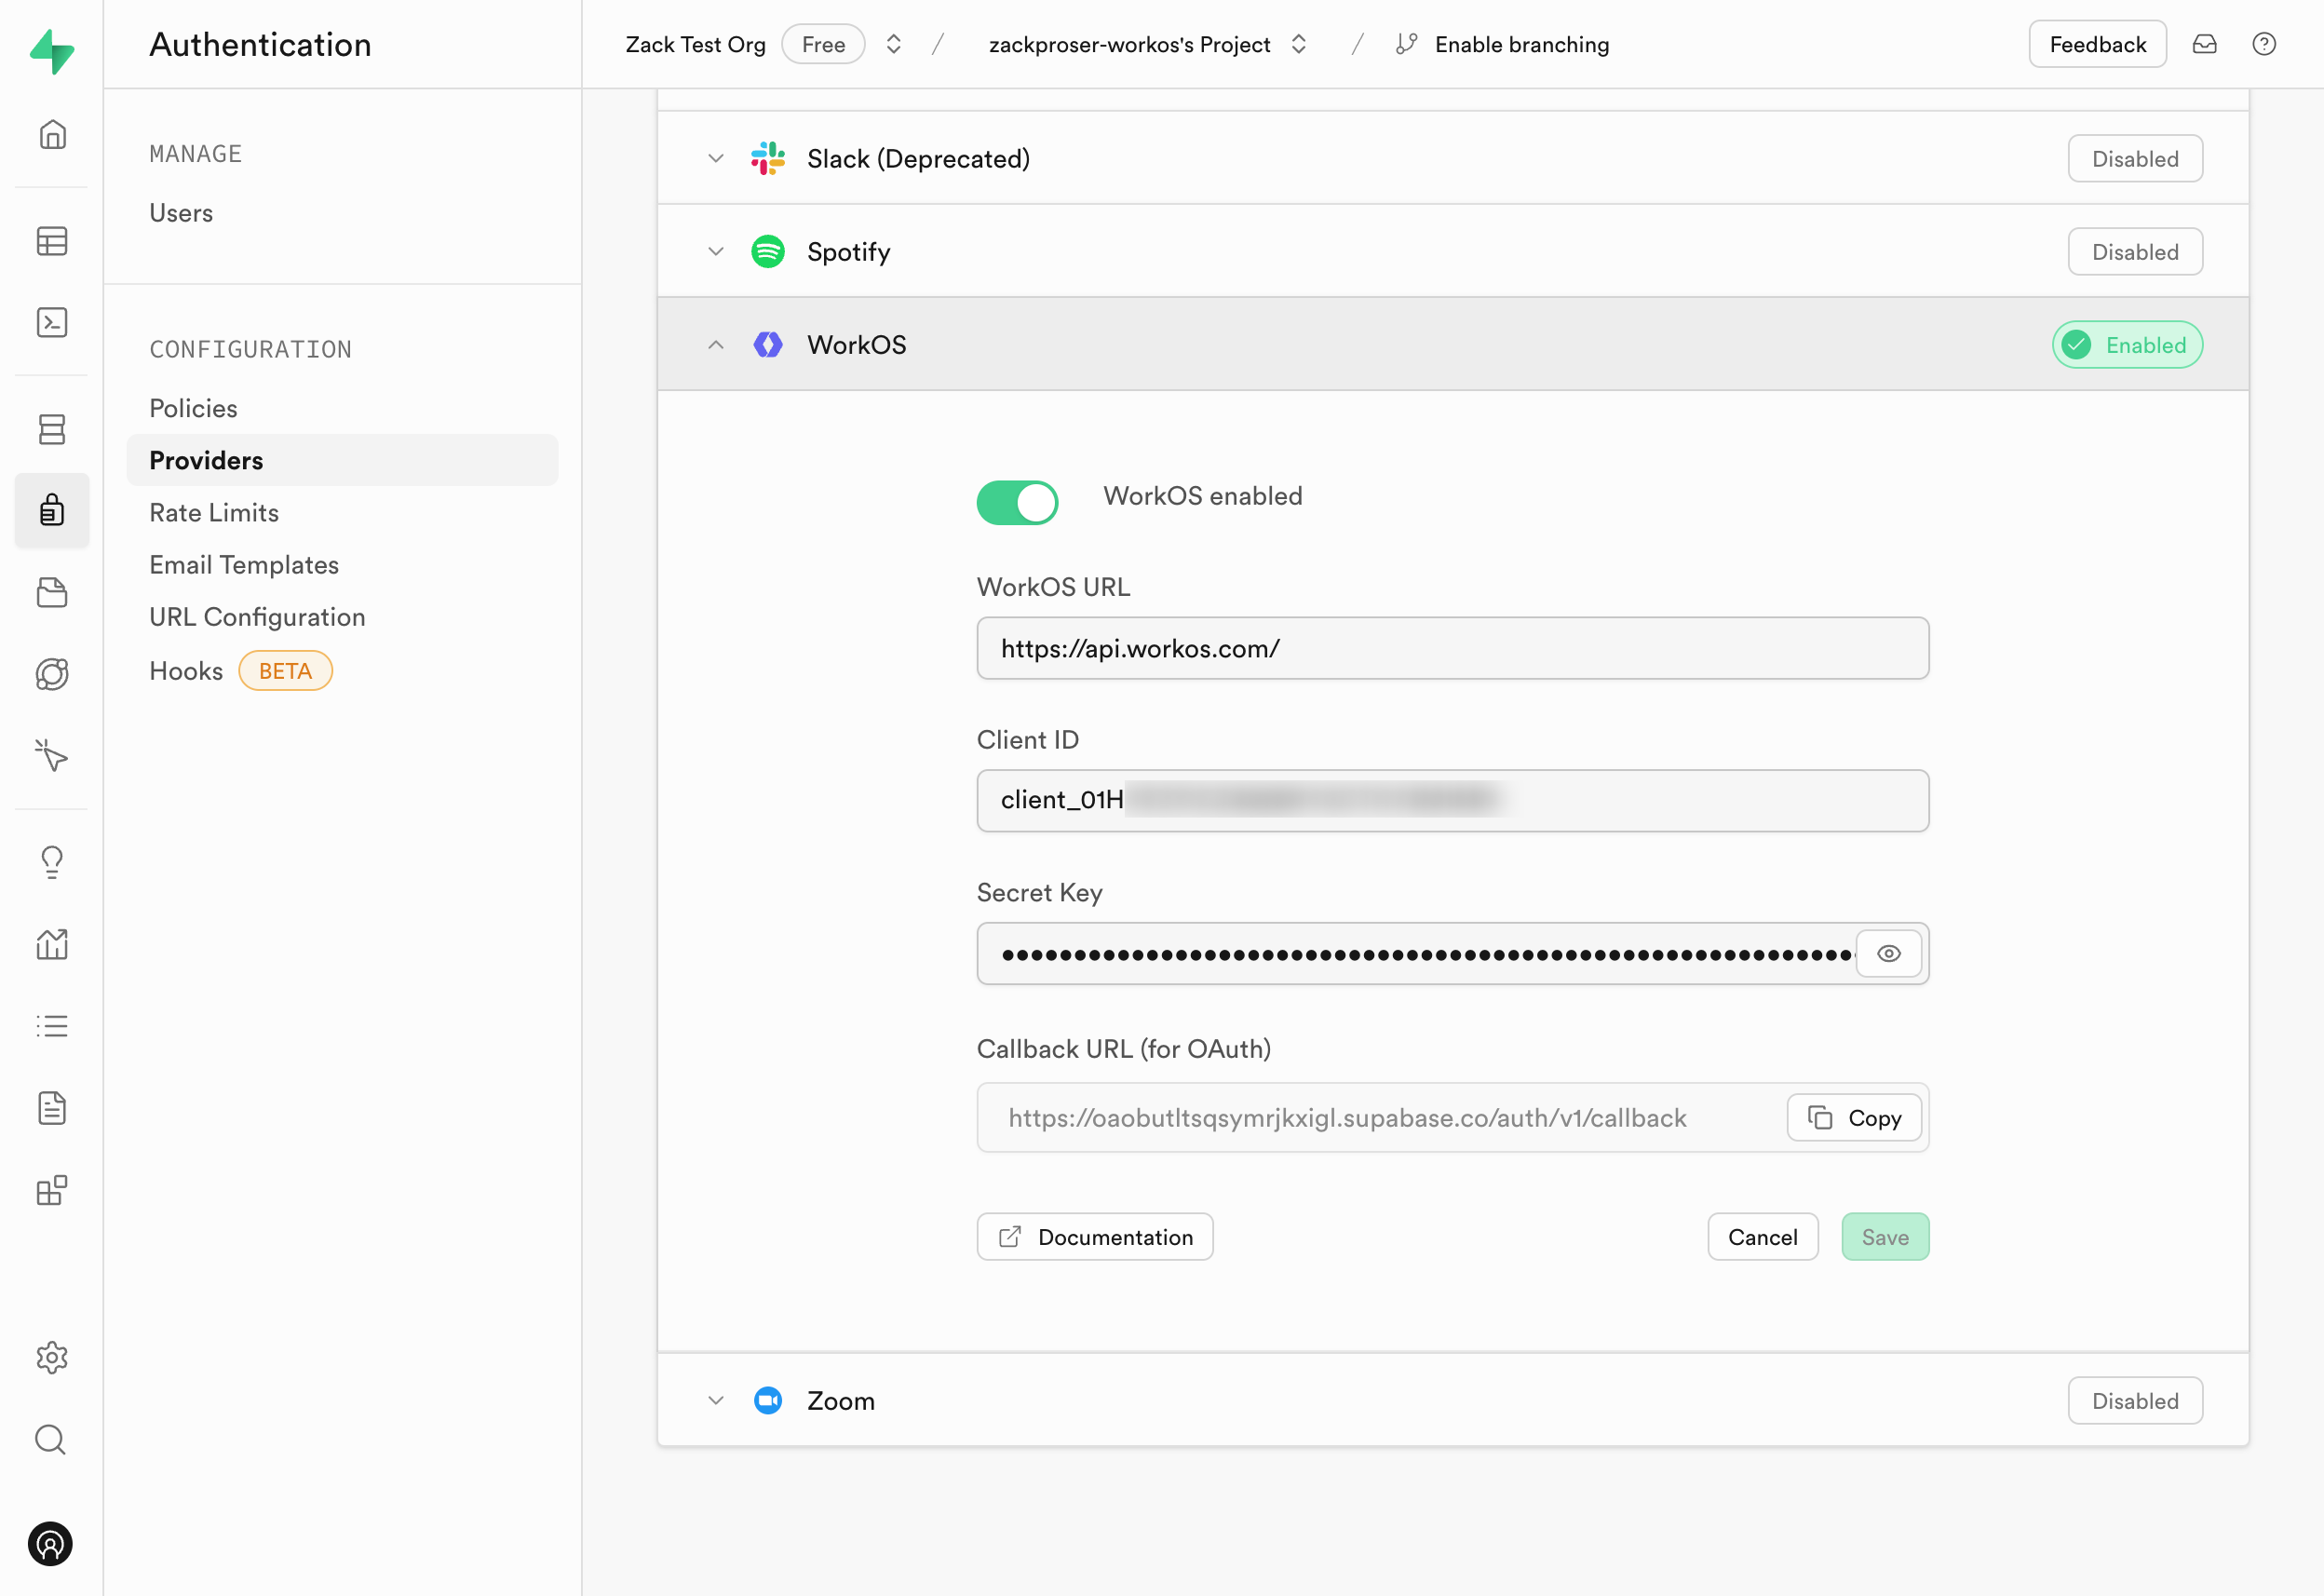
- 去你的 Supabase 项目仪表板。
- 在左侧边栏,点击认证图标(靠近顶部)。
- 在配置部分点击“提供商”。
- 点击手风琴列表中的 WorkOS 来展开。
- 把
WorkOS Enabled开关切换到开。 - 在 WorkOS URL 字段中输入
https://api.workos.com。 - 输入你在上一步保存的 WorkOS 客户端 ID 和 WorkOS 客户端密钥。
- 从表单中复制
Callback URL (for OAuth)值,然后把它保存到方便的地方。 - 点击保存。
你也可以使用管理 API 配置 WorkOS 认证提供商:
🌐 You can also configure the WorkOS auth provider using the Management API:
1# Get your access token from https://supabase.com/dashboard/account/tokens2export SUPABASE_ACCESS_TOKEN="your-access-token"3export PROJECT_REF="your-project-ref"45# Configure WorkOS auth provider6curl -X PATCH "https://api.supabase.com/v1/projects/$PROJECT_REF/config/auth" \7 -H "Authorization: Bearer $SUPABASE_ACCESS_TOKEN" \8 -H "Content-Type: application/json" \9 -d '{10 "external_workos_enabled": true,11 "external_workos_url": "https://api.workos.com",12 "external_workos_client_id": "your-workos-client-id",13 "external_workos_secret": "your-workos-client-secret"14 }'第4步。在 WorkOS 控制面板中设置你的 Supabase 重定向 URI #
🌐 Step 4. Set your Supabase redirect URI in the WorkOS Dashboard
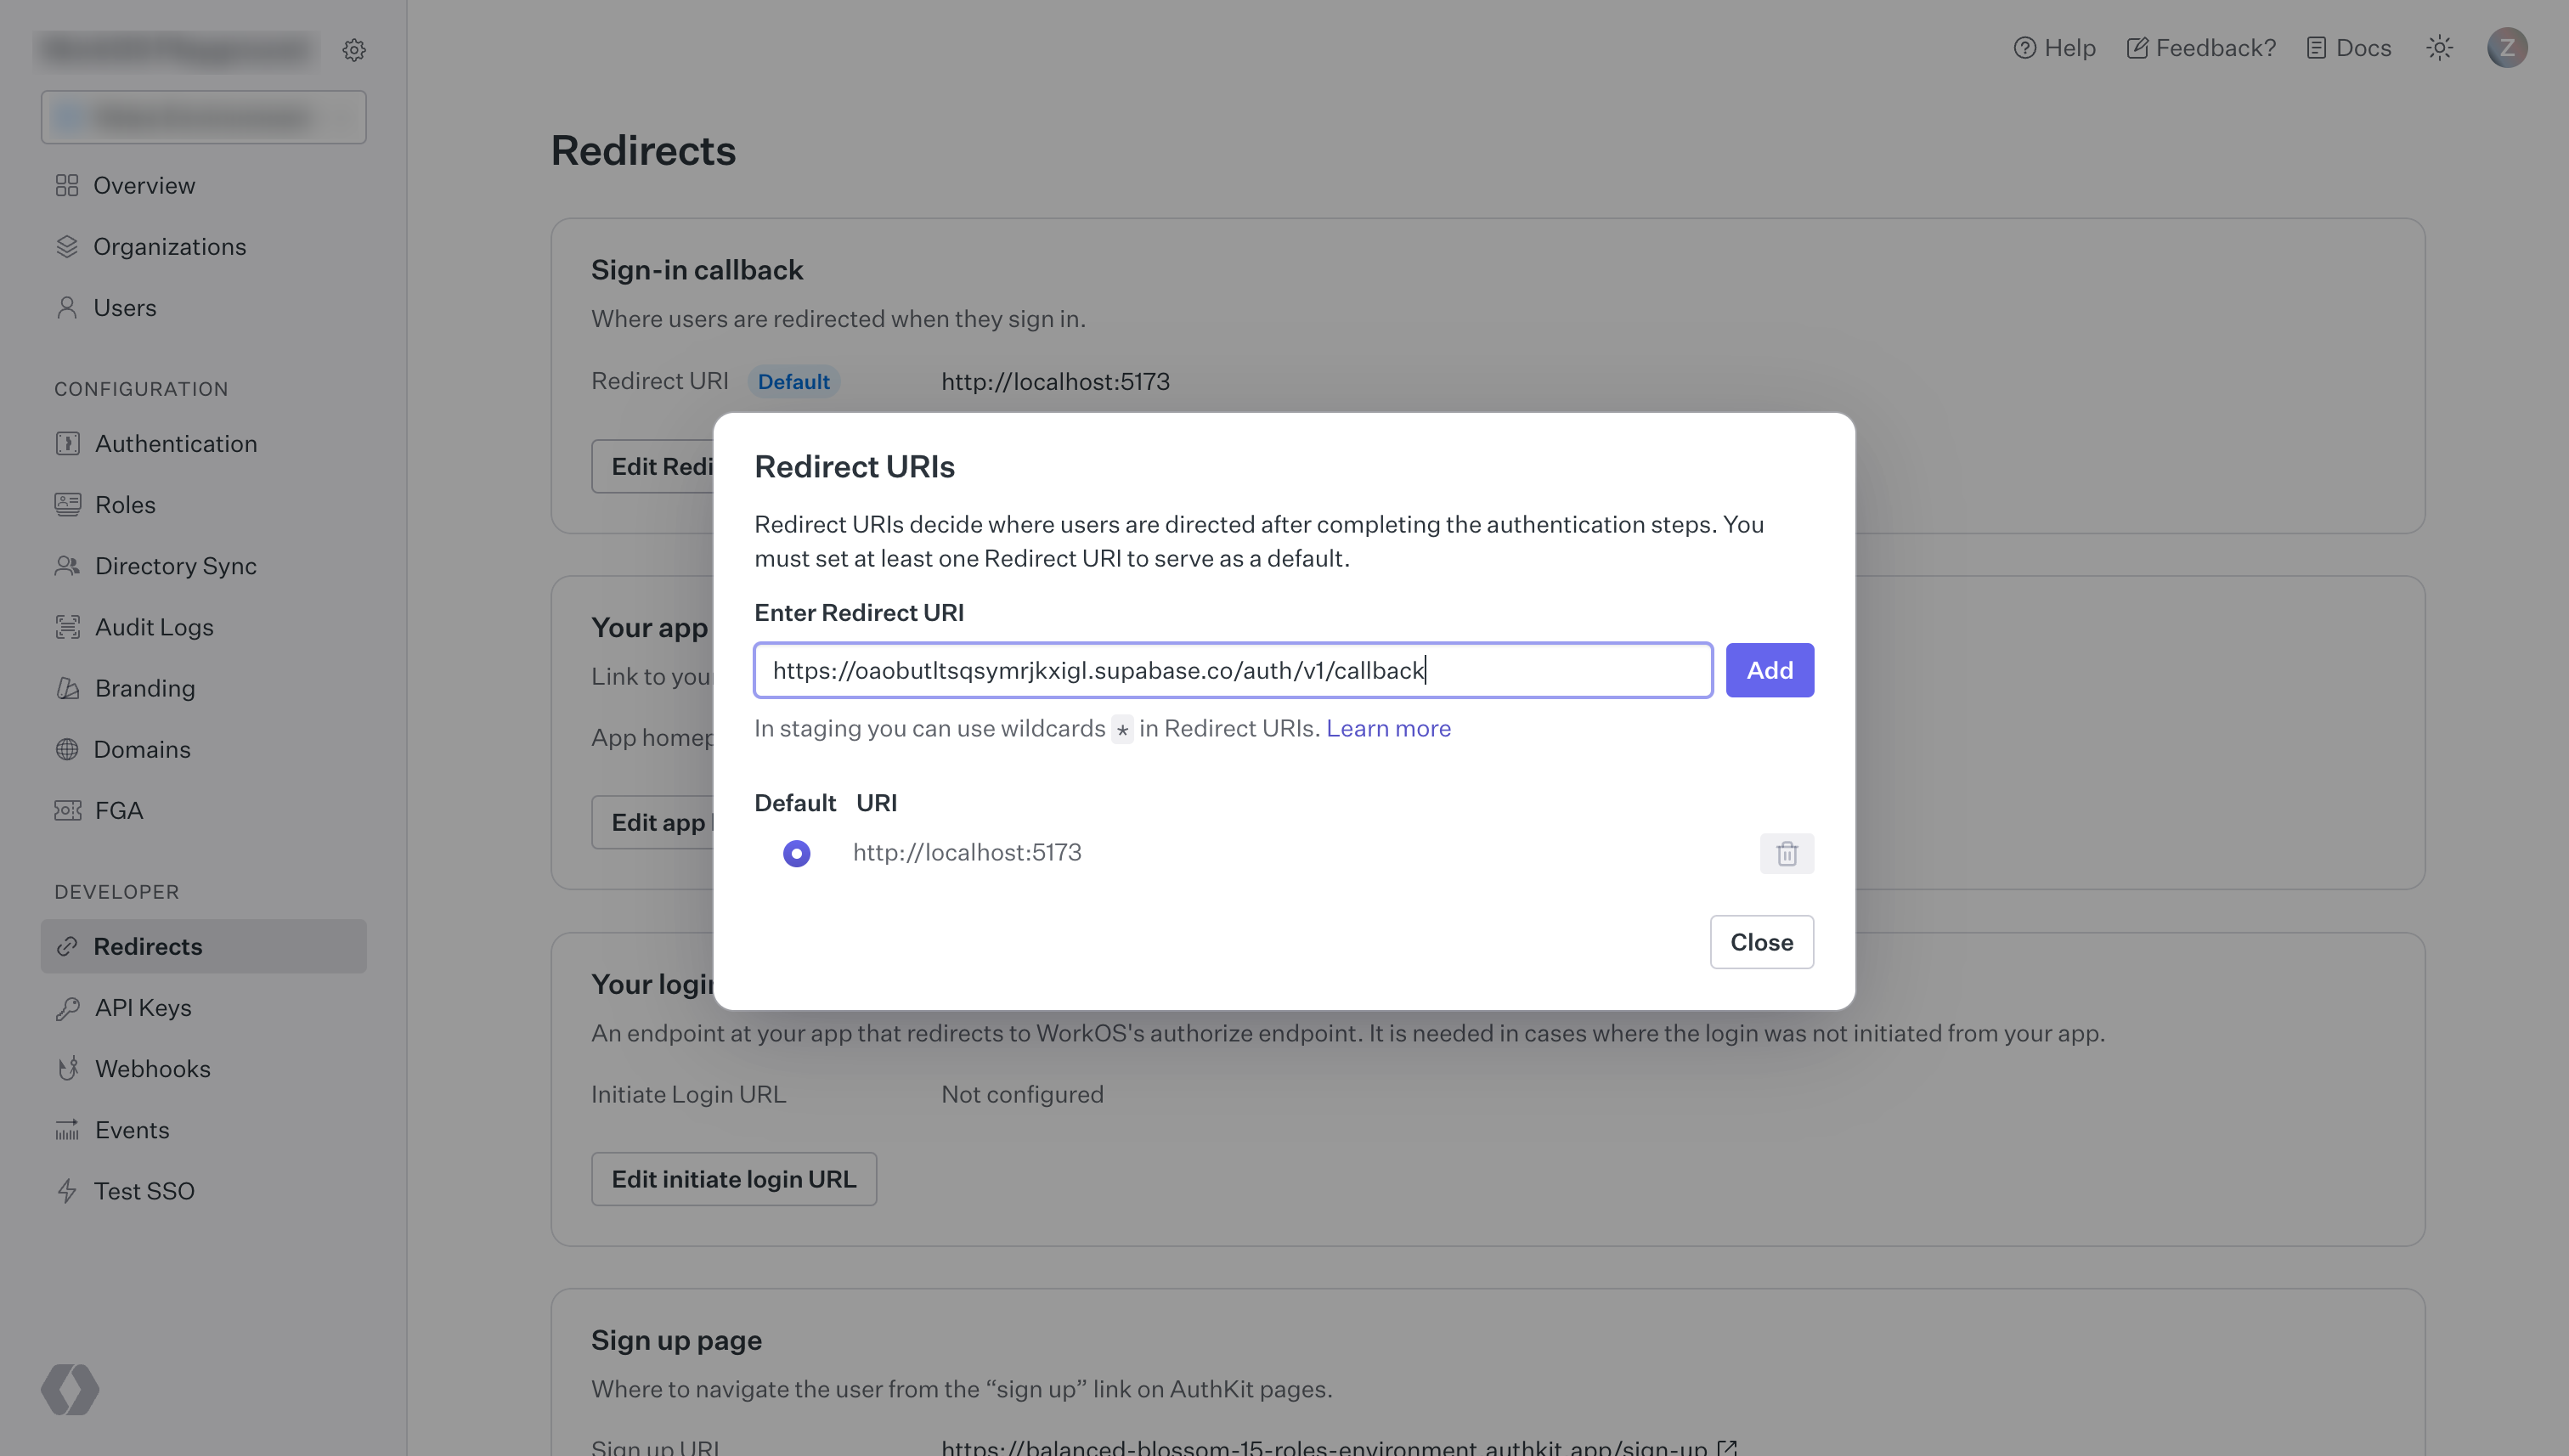
访问 WorkOS 仪表板,然后点击左侧导航栏的重定向按钮。
🌐 Visit the WorkOS dashboard and click the redirects button in the left navigation panel.
在重定向页面上,输入你在上一步保存的 Supabase 项目 Callback URL (for OAuth),如下所示:
🌐 On the redirects page, enter your Supabase project's Callback URL (for OAuth) which you saved in the previous step, as shown below:
步骤5:在你的客户端应用中添加登录代码 #
🌐 Step 5. Add login code to your client app
当用户登录时,用 workos 作为提供者调用 signInWithOAuth。
🌐 When a user signs in, call signInWithOAuth with workos as the provider.
1import { createClient } from '@supabase/supabase-js';2const supabase = createClient('https://your-project-id.supabase.co', 'sb_publishable_...');3const redirect = (url: string) => {}45// ---cut---6async function signInWithWorkOS() {7 const { data, error } = await supabase.auth.signInWithOAuth({8 provider: 'workos',9 options: {10 redirectTo: 'http://example.com/auth/v1/callback', // Make sure your redirect URL is configured in the Supabase Dashboard Auth settings11 queryParams: {12 connection: '<connection_id>',13 },14 },15 })1617 if (data.url) {18 redirect(data.url) // use the redirect API for your server or framework19 }20}你可以在 WorkOS 仪表板的“组织”标签下找到你的 connection_id。选择你的组织,然后点击“查看连接”。
🌐 You can find your connection_id in the WorkOS dashboard under the Organizations tab. Select your organization and then click View connection.
在你指定的回调 URL 中,你将用代码换取一个已登录的用户资料:
🌐 Within your specified callback URL, you'll exchange the code for a logged-in user profile:
1import { NextResponse } from 'next/server'2import { createClient } from '@/utils/supabase/server'34export async function GET(request: Request) {5 const { searchParams, origin } = new URL(request.url)6 const code = searchParams.get('code')7 // if "next" is in param, use it as the redirect URL8 let next = searchParams.get('next') ?? '/'9 if (!next.startsWith('/')) {10 // if "next" is not a relative URL, use the default11 next = '/'12 }1314 if (code) {15 const supabase = await createClient()16 const { error } = await supabase.auth.exchangeCodeForSession(code)17 if (!error) {18 const forwardedHost = request.headers.get('x-forwarded-host') // original origin before load balancer19 const isLocalEnv = process.env.NODE_ENV === 'development'20 if (isLocalEnv) {21 // we can be sure that there is no load balancer in between, so no need to watch for X-Forwarded-Host22 return NextResponse.redirect(`${origin}${next}`)23 } else if (forwardedHost) {24 return NextResponse.redirect(`https://${forwardedHost}${next}`)25 } else {26 return NextResponse.redirect(`${origin}${next}`)27 }28 }29 }3031 // return the user to an error page with instructions32 return NextResponse.redirect(`${origin}/auth/auth-code-error`)33}资源 #
🌐 Resources